Death Stranding, originally a PlayStation exclusive, was Hideo Kojima’s new game following his departure from Konami. Running on the Decima engine, which also powers Horizon Zero Dawn and Forbidden West, the game looks incredible on all platforms. While it is a very well-optimized game for PC and consoles, PC users report experiencing crashes and errors, like random crashes during gameplay. I have compiled a list of fixes that will prevent Death Stranding from crashing on your PC.
8 Confirmed Fixes for Death Stranding Keeps Crashing on PC
Many PC users in the community mention that Death Stranding Director’s Cut crashes while playing with or without error messages. There are numerous reasons behind it, such as playing Death Stranding with NVIDIA DLSS, issues with Intel 13th and 14th-gen CPUs, in-game overlays, uncapped FPS, and more. The fixes explained below will fix the Death Stranding gameplay crash on your Windows PC.
Fix #1 – Disable NVIDIA DLSS
NVIDIA’s RTX GPUs use Deep Learning Super Sampling (DLSS), an AI-based technology to upscale a low-resolution image and boost FPS. While it improves performance and subsequently the experience, it also forces Death Stranding to crash on your Windows 11 PC.
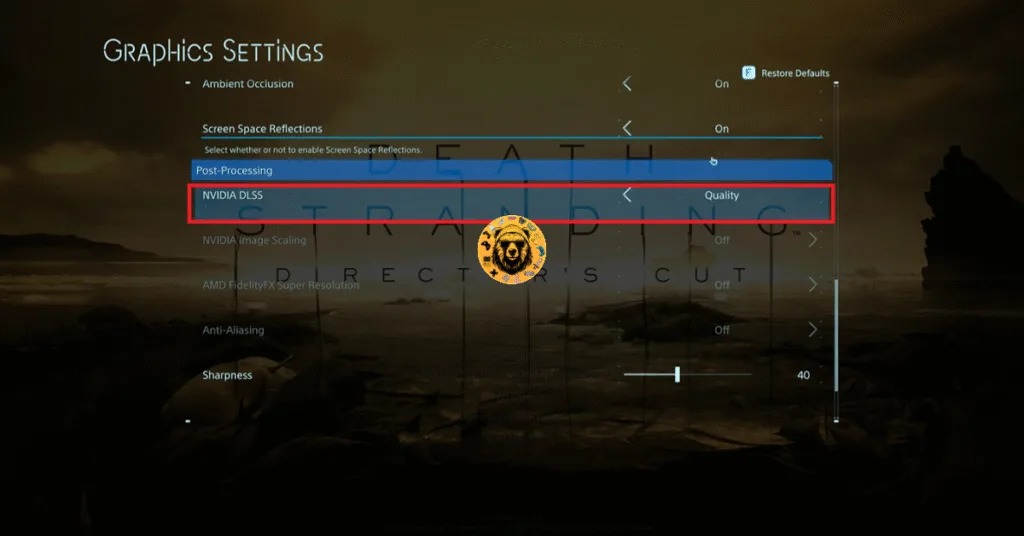
Some players experience the Access Violation (C0000005h) error code after the crash. To fix these in-game crashes, turn off DLSS from the in-game graphics menu. Here is how you can apply this fix.
- Go to Death Stranding’s settings menu and select the “Graphics settings” option.
- Look for the “NVIDIA DLSS” option under “Post Processing”.
- Turn off DLSS and apply the changes.
- Play Death Stranding, and it will not crash while playing.
Fix #2 – Update BIOS for your Intel 13th and 14th Gen CPUs
Intel’s 13th and 14th gen CPUs are often the reason behind games crashing while playing. Many PC users facing Death Stranding in-game crashes report that they are using 13th or 14th gen CPUs; even Intel has acknowledged it. If you are using a CPU from these Intel Generations, then this is the reason Death Stranding keeps crashing on your Windows 11 PC. You can fix this issue by updating the BIOS.
Fix #3 – Reduce Performance Core Ratio for Your Intel CPUs
As I have already mentioned above, Intel’s 13th and 14th gen CPUs are the reason behind games crashing to desktop with or without error messages, and the quickest way to fix this issue is to update the BIOS. However, some PC users report that the Death Stranding in-game crash issue persists after updating the BIOS.
If this is the case with you, I suggest reducing the Performance Core ratio of your Intel 13th or 14th generation CPU. Here is how you can apply this fix.
- Download and install Intel Extreme Tuning Utility.
- Open the app and set the Performance Core ratio to 53x or 54x.
- Launch Death Stranding now, and it will not crash in-game.
Fix #4 – Disable All In-Game Overlays
The benefit of playing games on a PC is that users can utilize various software and apps to make gaming a better experience. One of these features is in-game overlays that allow users to access different features without having to minimize or close the game. Death Stranding DC is crashing in-game because of these overlays, whether you are using them or not, as they are enabled by default. Disable in-game overlays for all gaming apps like Discord, the NVIDIA app, Steam, and GeForce Experience to fix these crashes. Here is how you can do it for each gaming software:
- Discord: Go to User Settings and click the “Game Overlay” tab. Turn off the “Enable In-game Overlay” options.
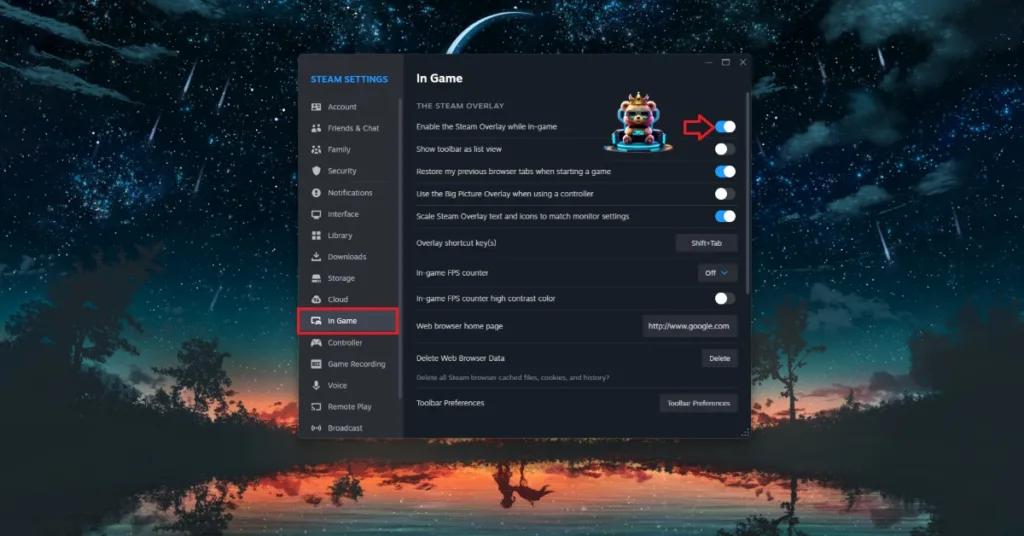
- Steam: Open Steam settings, select the “In-game tab”, and turn off the “Enable the Steam overlay while in-game” option.
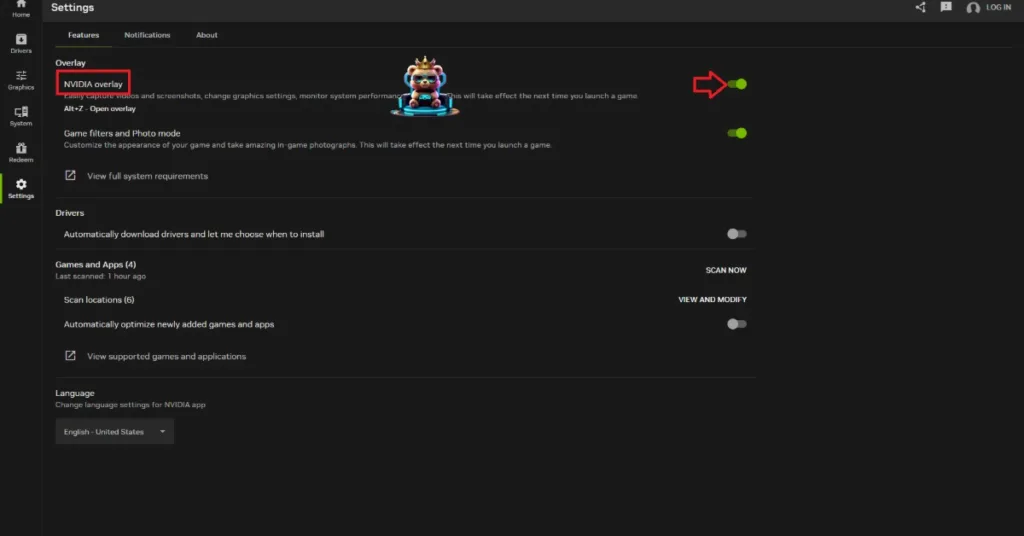
- NVIDIA App: Open the NVIDIA app, go to settings, and click the “Features” tab. Turn off the “NVIDIA Overlay” option.
- GeForce Experience: Click the gear icon right next to your username, go to General, and turn off the “IN-GAME OVERLAY” option.
Fix #5 – Play Death Stranding with an FPS Cap
Playing games at uncapped FPS has its perks in the form of smoother gameplay and reduced input latency. While this makes gaming a better experience, it also puts unnecessary load on your CPU and GPU, which often leads to in-game crashes. If you are playing Death Stranding director’s cut with an uncapped FPS, it is the reason the game keeps crashing on your Windows 11 PC.
You can prevent Death Stranding’s gameplay crashes by limiting its max FPS in three different ways, including enabling V-sync, using the in-game FPS limiter, and the NVIDIA app or Control Panel.
Turn on Vertical Synchronization (If Disabled)
Some PC users turn off vertical synchronization, or V-sync, to play Death Stranding at unlocked FPS regardless of the display refresh rate. It results in a low-latency gameplay experience but causes screen tearing. If you have disabled V-sync, enable it, and Death Stranding will not crash while playing. Here is how to do it:
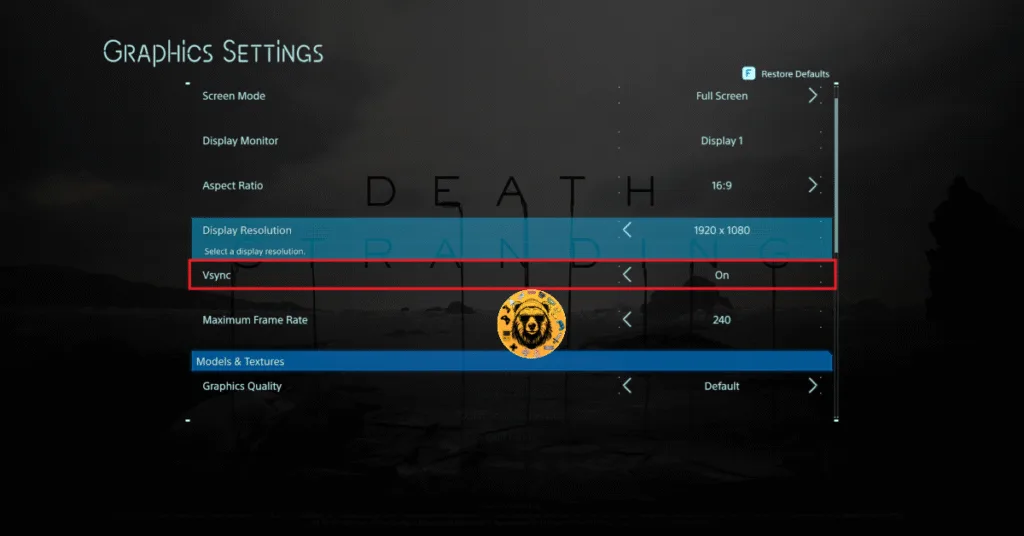
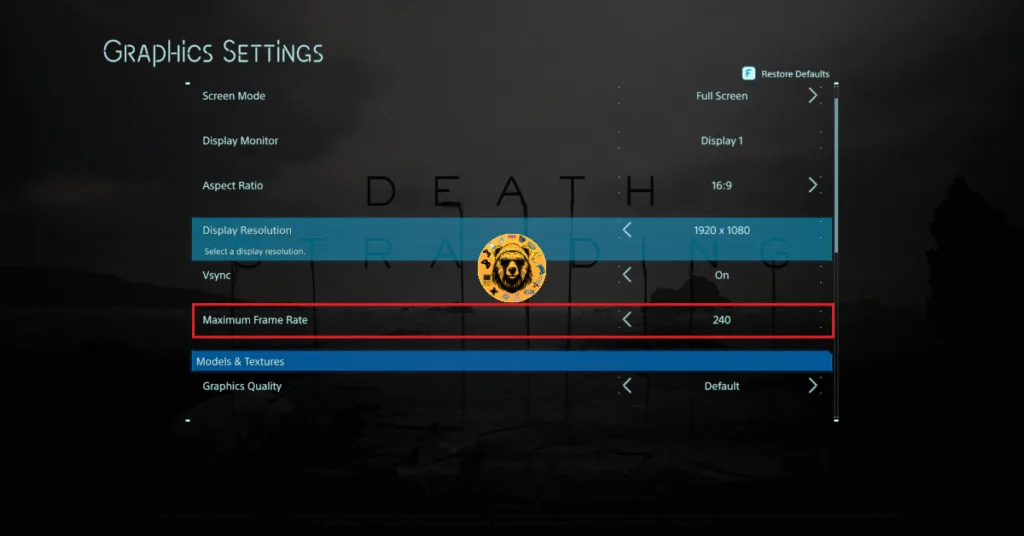
- Go to Death Stranding’s “Graphic Settings” tab.
- Turn on “Vsync” from the options.
- Play the game now, and the random in-game crashes are fixed.
Use Death Stranding’s In-Game FPS Limiter
If you are using a Variable Refresh Rate (VRR) or a high refresh rate monitor, you can use Death Stranding’s in-game FPS limiter to cap the framerate and prevent it from crashing while playing. To apply this fix, go to the game’s graphics settings and use the “Maximum Frame Rate” option to set the FPS value.
NVIDIA App or NVIDIA Control Panel
While the game’s “Maximum Frame Rate ” works just fine, it doesn’t provide you with granular control over the game’s FPS. If you are looking for more customized control, you can use the NVIDIA app or Control Panel to cap the FPS. I have explained them below.
- Open the NVIDIA app and go to the “Graphics” tab.
- Select “Death Stranding” from the list of games.
- Scroll down and select the “Max Frame Rate” option.
- Turn it on and set a value for it.
- Play Death Stranding now, and the in-game crashes are now fixed.
If you don’t have the NVIDIA app installed on your PC, you can apply this fix through the NVIDIA Control Panel as well.
- Open the NVIDIA Control Panel, and go to “Manage 3D Settings” under “3D Settings”.
- Go to the “Program settings” tab and select Death Stranding from the drop-down menu.
- Look for the “Max Frame Rate” option. Enable it, set a value for it, and click Apply.
- Death Stranding crashing on Windows 11 PC errors are now fixed.

Useful tip: Unless you are playing the game on a G-Sync or FreeSync display, the frame rate value should be 1/2, 1/3, or 1/4 of your display refresh rate; otherwise, the game will feel jittery. This will only apply if you have VSync enabled.
Fix #6 – Underclock Your Graphics Card
Death Stranding DC is crashing because you have overclocked your graphics card. Revert it to its default GPU and Memory clocks, and the game will not crash anymore.
It is possible that you have not overclocked your card, but you are still experiencing the in-game crash issue. Most graphics cards from NVIDIA and AMD AIB third-party partners are overclocked by default or use higher GPU and Memory clocks. These higher clocks are crashing Death Stranding during gameplay. Here is how you can fix these crashes for both NVIDIA and AMD graphics cards.
NVIDIA – Enable Debug Mode
Open NVIDIA Control Panel, click “Help” from the top menu, and select “Debug” mode. It will force your NVIDIA graphics card to use NVIDIA-recommended GPU and Memory clocks and prevent in-game crashes.

AMD – Through AMD’s Adrenalin Software
AMD’s Adrenalin Software doesn’t offer a specific option to force the graphics card to use reference GPU and Memory clocks like the Debug Mode for NVIDIA graphics cards. To fix the in-game crash issue in Death Stranding on your AMD graphics card, you can manually underclock the graphics card with the help of the following steps:
- Look up the reference clocks for your AMD graphics card online.
- Open Adrenalin Software.
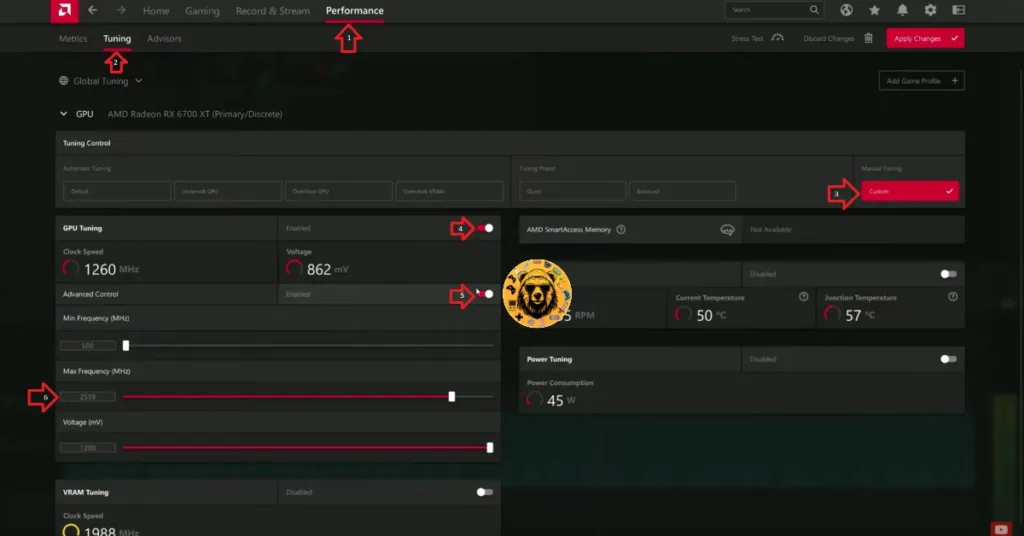
- Go to the “Performance” tab and select the “Tuning” tab.
- Click “Custom” under “Manual Tuning”, enable “GPU Tuning,” and also enable “Advanced Control.”
- Three sliders will appear on your screen: Minimum Frequency, Maximum Frequency, and Voltage. You have to work with only the Maximum Frequency slider.
- Move the Maximum Frequency slider slightly to the left (use the reference frequency), and click “Apply Changes”.
- Play Death Stranding now, and the in-game crashes are now fixed.
The difference in clock speeds between the reference model and the third-party AIB model is small, somewhere between 50 – 100 MHz. The performance loss should be negligible, and your gaming session won’t be interrupted due to random crashes.
Fix #7 – Tweak Windows TDR Settings
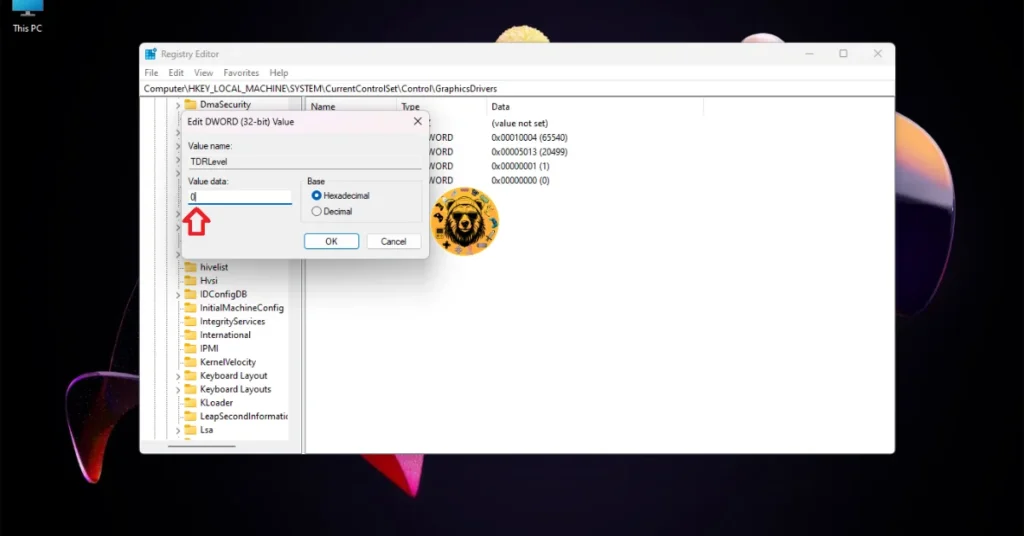
In case the above fixes don’t work and Death Stranding keeps crashing, I recommend overriding Windows TDR settings to reset the GPU driver when it stalls instead of shutting it down. Timeout Detection and Recovery (TDR) is an in-built feature in Windows that helps recover the GPU driver when it stalls. However, at times, TDR falsely crashes the driver, which results in Death Stranding in-game crashes. You can fix it by tweaking the TDR settings through the Windows Registry Editor. Here is how you can apply this fix:
- Launch Windows Registry Editor as an administrator.
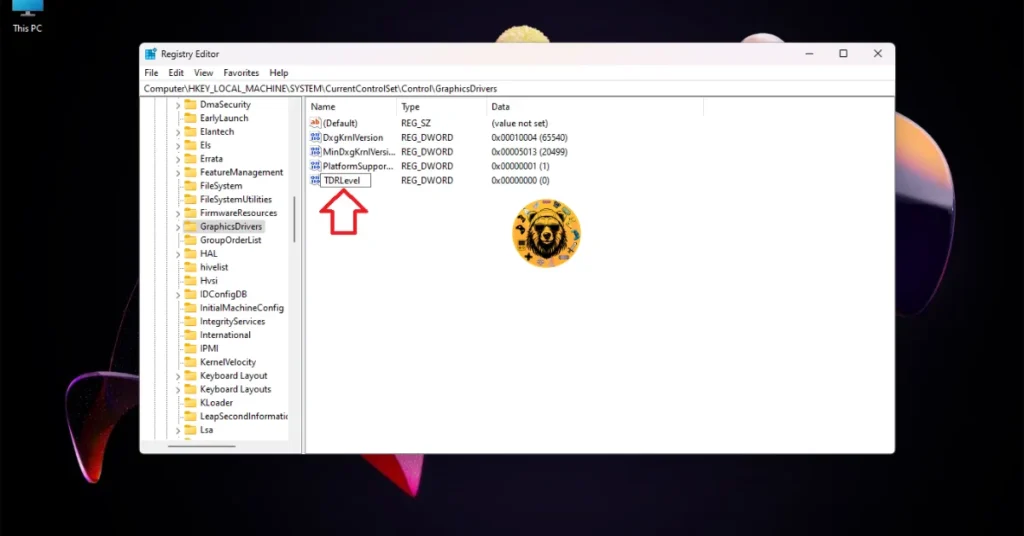
- Click HKEY_LOCAL_MACHINE, click SYSTEM, go to CurrentControlSet, select Control, and finally select GraphicsDrivers.
- Go to the right side of the window and right-click anywhere in the blank space. Navigate to New and select the “DWORD (32-bit) Value” option.
- Name the new file “TDRLevel”.
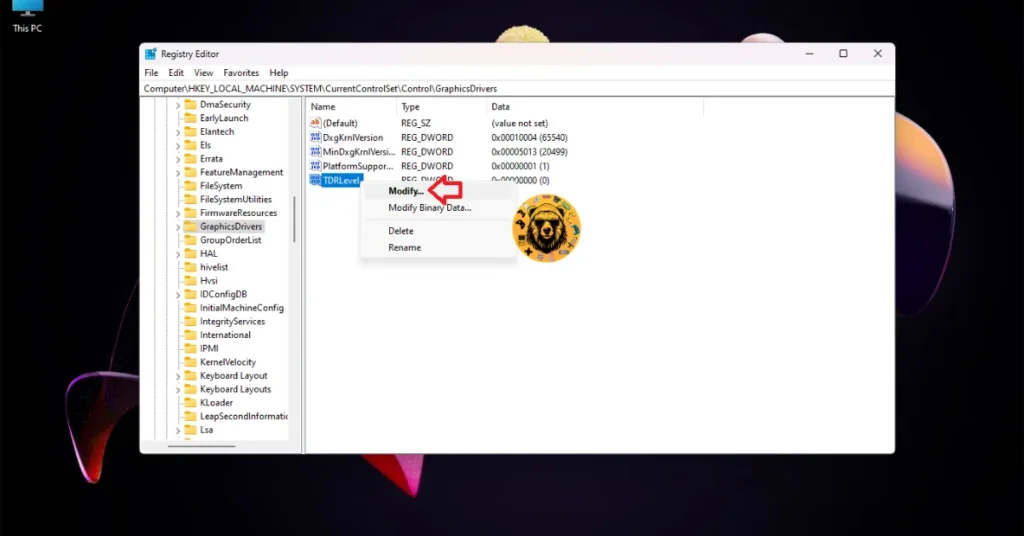
- Right-click the file “TDRLevel” you just created, click Modify, and ensure that the value under “Value data” is 0.
- Restart your PC.
- Play Death Stranding, and the in-game crashes are now fixed.
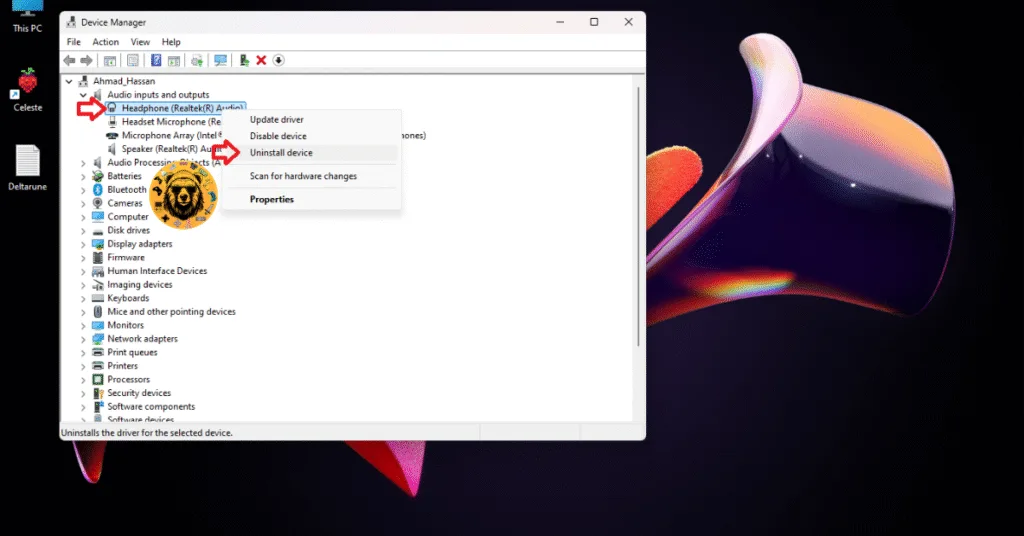
Fix #8 – Remove and Reinstall Realtek Sound Devices
Many PC gamers in the community have mentioned that the Realtek Audio device is the reason behind Death Stranding’s in-game crash. Delete and reinstall it through Device Manager, and the game will not crash again.
- Press the Windows key on your desktop, type “Device Manager”, and open it.
- Go to “Audio Inputs and Outputs” and look for the Realtek Audio device. Uninstall it. (Uninstall all Realtek devices listed.)
- Right-click “Audio Inputs and Outputs” and select “Scan for hardware changes”. It will automatically reinstall the Realtek Audio device.
- Play Death Stranding, and it will not crash while in-game.

There you have it, folks. I have mentioned all the fixes for the Death Stranding in-game crash error. If you are experiencing errors while playing other games on PC and handhelds, head over to our hub of commonly occurring errors and fixes.