The screenshot button on the Steam Deck is not placed at the most convenient location. By default, you have to press Steam and R1 buttons together to take a screenshot.
You can keep things as is but for some people this location is a bit clunky, and I get it. If you are someone who frequently takes screenshots on your Steam Deck, you may be looking for a way to remap to change the screenshot button on Steam Deck.
So, here’s how it works.
Step 1: Power On and Select Your Game
Turn on your Steam Deck Navigate to the game for which you want to change the screenshot button and press the A button to select it.
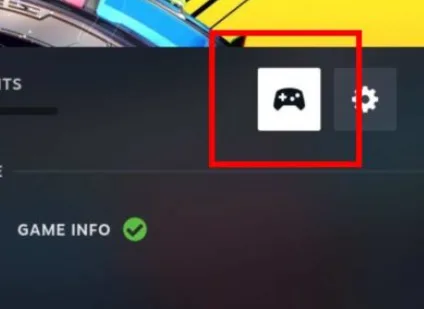
Click on the Controller icon on the game’s page. This will take you to the controller settings for that specific game.
Step 2: Remap the Button
In the controller settings, select Buttons from the left-hand menu.
Scroll through the right-hand side until you find the button you want to assign for taking screenshots. For example, you might choose the L4 button, which is often underutilized.
Highlight that button and click on Add Command, then press A.
You will see a list of functions. Look for Take Screenshot and select it. This action will map the screenshot function to the button you chose in the previous step.
Press the B button to exit the menu. Your changes will be saved automatically.
Remember that different games may handle remapping differently, so it’s a good idea to test your new configuration in-game to ensure it works as expected.
You can also explore other functions that can be remapped, such as volume controls or keyboard shortcuts.
Some of the other functions you can remap on Steam Deck are:
- Take Screenshot
- Show Keyboard
- Toggle Magnifier
- Force Game Shutdown
- Change Play Slot
- Touchscreeen Native Support
- Soutchsceren Left Click
- Touchscreen Right Click
- Touchscreen Scrollwhell Click
- Touchscreen Cursor Movement
- Touchscreen Off
- Volume Up Key
- Volume Down Key