One of the reasons gamers love the Steam Deck is its performance overlay pops up and shows FPS, temps, and power use right away. The Asus ROG Ally misses that native feature, but you can build a similar, even roomier, overlay with free programs: RTSS, HWiNFO64, and, if you like, MSI Afterburner.
The process is very simple and in this quick guide I will explain how you too can enjoy Steam Deck Overlays on your Asus ROG Ally and Ally X. Getting everything done works the same way on both handhelds, so follow the steps exactly on your ROG Ally or Ally X.
First, grab and install these tools:
- RTSS (RivaTuner Statistics Server)
- HWiNFO64
- Optional: MSI Afterburner
If you want an even faster start, you can snag a ready-made .ovl file that looks just like the Steam Deck overlay.
Configure HWiNFO64 for Sensor Data
When everything is installed, fire up HWiNFO64 and pick Sensors-only at the start.
Hit Configure to turn on the bits you care about:
- CPU temp and load
- GPU temp and load
- Battery percent and drain speed
- RAM use
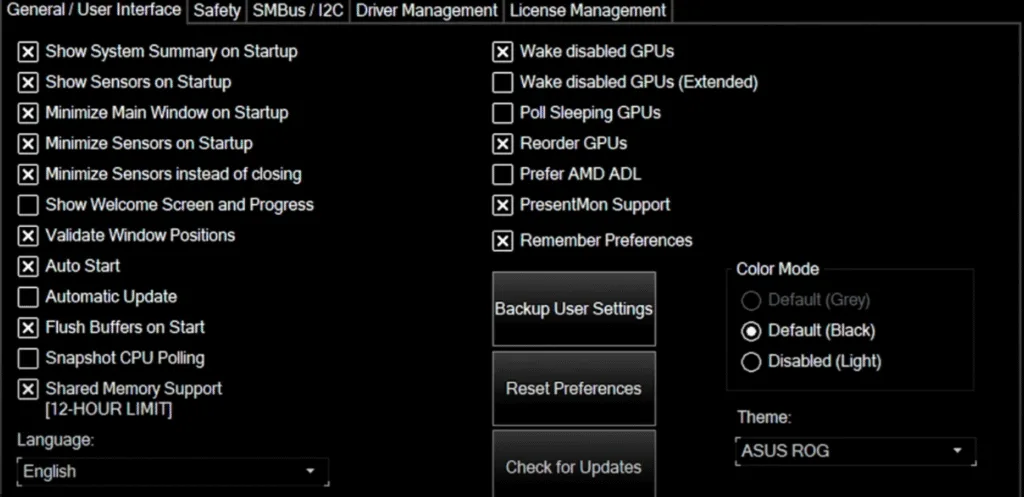
I recommend using the following settings on HWiNF064.
Leave the sensor window minimized; RTSS will grab numbers from there while you game.
Set Up RTSS and Turn on the Plugins
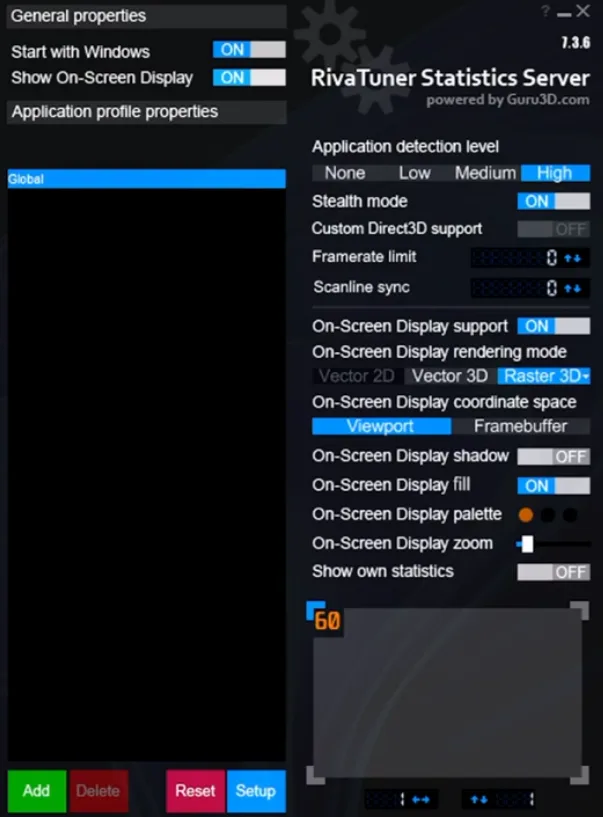
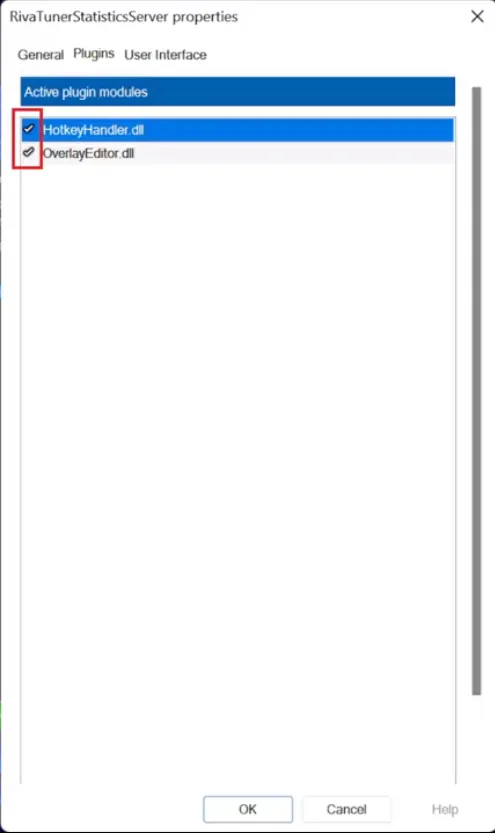
First, launch RTSS and input the settings I shared above. Then click the little Setup button in the bottom-right corner. A new window pops up, and you should see a tab labeled Plugins; click it there .
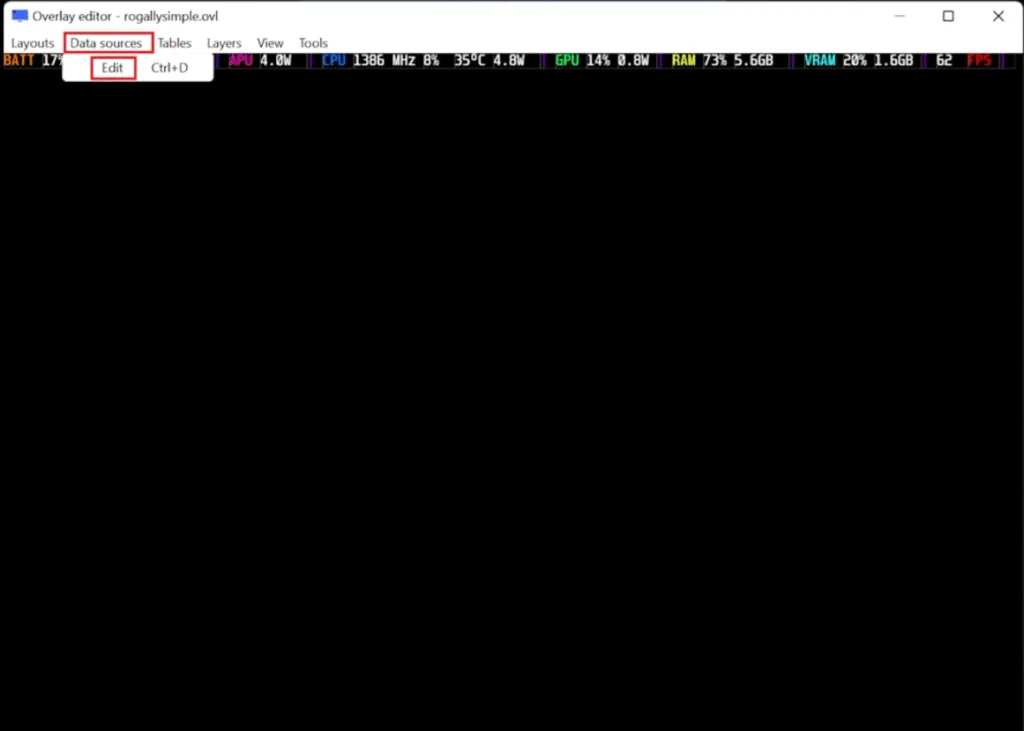
Turn on the two key plugins, OverlayEditor.dll and HotkeyHandler.dll. These plugins let you build the overlay and quickly show or hide it while you are playing. After that, double-click OverlayEditor in the list to open the overlay designer. In the new Overlay Editor window, head to the Data Sources tab and hit Edit.
Now you can add data sources from RTSS (like FPS and frame times) and from HWiNFO64 (the hardware numbers you turned on earlier). Double click overlay editor and click on Data Source:
Now add all of the following data sources you see in the image below.
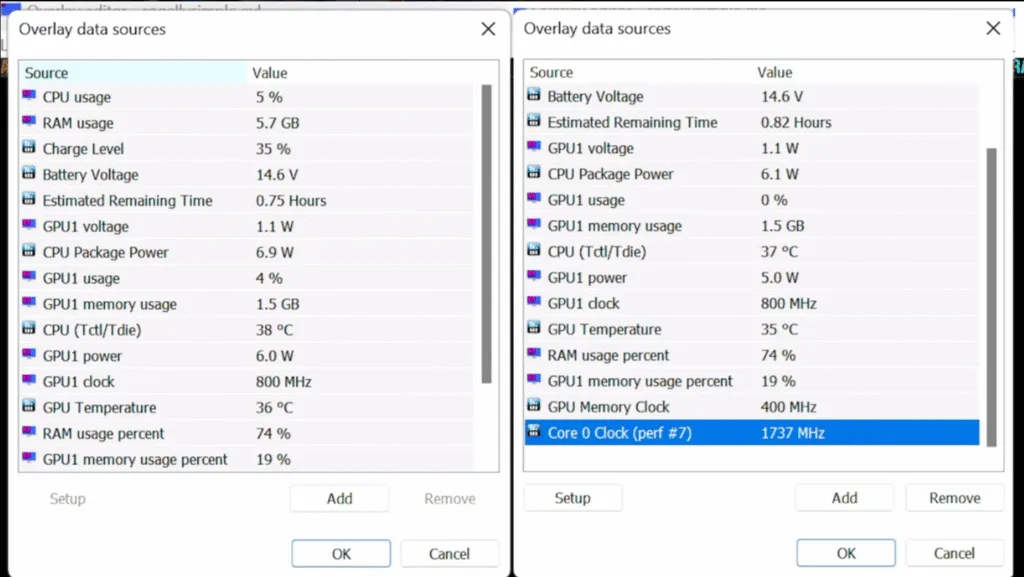
Linking this data to the screen display gets everything ready for the layout changes you want to make.
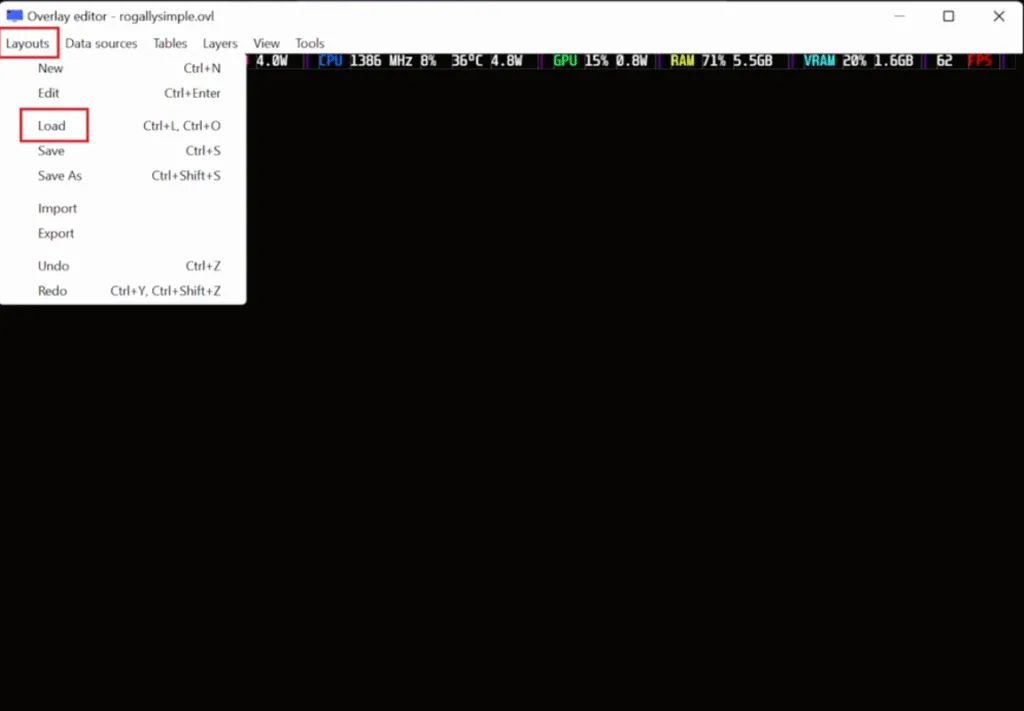
Load or Customize the Overlay Layout
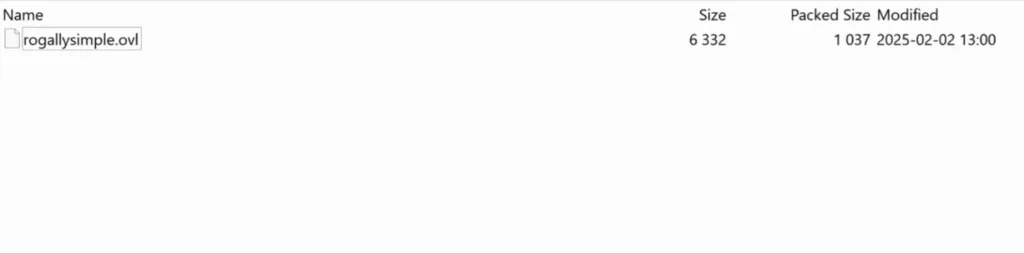
After connecting your data sources, you’re ready to load a pre-made layout or start a fresh overlay from scratch. If you have a Steam Deck-style file saved on your PC-usually marked with the .ovl ending-head to the Layouts tab in the Overlay Editor, tap Load, and pick that file. I recommend downloading this custom Asus ROG Ally Overlay.
Unzip the layout file somewhere you can easily access on your ROG Ally handheld. Go back to the RTSS Overlay Editor and load the unzipped overlay file.
Set Up a Hotkey to Toggle the Overlay
To quickly pull up your custom performance overlay while you play, youll need to set a hotkey that turns it on and off. You do this in two steps: first tweak your gamepad controls in Armoury Crate, then jump into RTSS to link that hotkey.
Fire up Armoury Crate on your ROG Ally and head to Settings > Configure under Control Mode. In Gamepad Mode, you will map a key stroke to an actual button on the Ally-usually the Start or Back button.
In the Key Mapping tab highlight the Start button and hit Edit beside Secondary Function. Scroll down, pick Combine Keys, then press the X on your Ally to start the macro setup. When asked, type in Left Shift and the apostrophe key ( ‘). This gives you a hand- held shortcut (Shift + ‘) that RTSS will see later.
Once the macro is done, hit B to back out, cursor over the new macro, and press A to lock it to the button you picked. Congratulations, you have linked a controller button to a handy keyboard combo.
Next, fire up RTSS and hit the Setup button, the big gear icon. Move over to the Plugins tab, find HotkeyHandler, then double-click it to open the settings. Click the empty box beside Toggle On-Screen Display, press Back and Start on your ROG Ally at the same time, and watch the field fill with Shift + . If that happens, you nailed the macro.
Once you’re happy, save the change and send RTSS to the taskbar. From now on, while youre deep in a game, the Back + Start combo will pop the performance overlay up or hide it, no keyboard and no alt-tab needed. Its a tidy, console-like trick that gives your Windows handheld the same flair the Steam Deck shows off.
Launch a Game and Test the Overlay
After you finish the setup, boot up any game on the ROG Ally and hit the hotkey. The overlay should slide into the corner with live numbers for FPS, CPU and GPU temps, usage percentages, RAM load, and how fast the battery is draining or charging. Keep in mind it will stay there until you press the key again, giving you a handy tool for fine-tuning performance or running quick benchmarks.