Modding on Steam Deck can be done multiple ways for multiple games like Palworld, House Flipper 2 etc. but for a while I’ve been trying to figure out the best and easiest to understand method to mod Fallout games. And after trying Vortex, Mod Organizer, direct file replacement, and what not, I think I have the best way to do it, finally.
Since Fallout 76 is back in business thanks to show let’s mod it together!
Step #1: Protect Your Game Files Before Modding
Twice now I have corrupted or broken something in my game files while modding games. Before you try to mod Fallout 76 or any other game for that matter, make sure to back up your original game files. I cannot stress this enough.
It is extremely easy to back up game files. Go to Steam Library and right click on Fallout 76. Go to Properties > Local Files > Backup Game Files.

Another method is simply copying your game files from the install directory to whatever external storage you have. If something goes wrong, you can copy paste the back up in the install directory and recover the backup through Steam.
Step #2: Download Protontricks And Flatseals
Now we prepare for the modding!
Head to the Steam Deck Discover Store (in Desktop mode) and search for Protontricks. It is one of the two plugins we need to install mods on Fallout 76. The second plugin we need is called Flatseals.

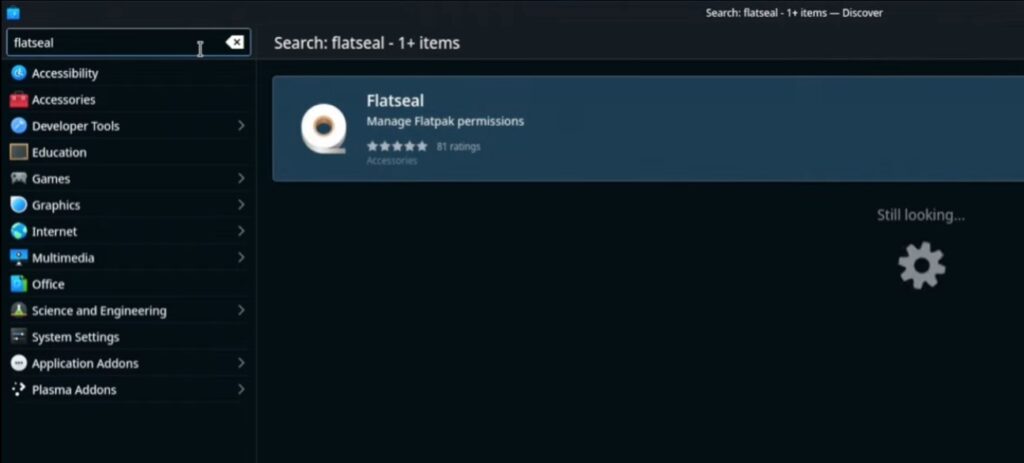
Now the next step is important. Launch Flatseal but only after you have downloaded and installed Protontricks. I repeat! Launch Flatseal but only after you have installed Protontricks on your Steam Deck.
Once you have it open, explore the left tab to find and select Protontricks. Now scroll down in Protontricks options, all the way to “File System” section. Make sure every option in the File System section is checked.

Close or minimize Flatseal once you have made sure all options are setup correctly.
Step#3: Set Proton Compatibility To 6.3.8
Open Steam and right click on Fallout 76. Go to Properties > Compatibility, and check what Proton Version is running. For any Fallout game; be it Fallout 4, New Vegas, Fallout 76, or Fallout 3 I recommend using 6.3.8.
If your proton version is different, click on the little arrow next to the proton version and change it to 6.3.8.

Once the game is set to 6.3.8, launch it to confirm everything is running smoothly. Close it down if everything is fine.
Step #4: Install Linux Version Of Mod Organizer
One of the most common mistakes modders make is that they download the Windows version of the Mod Organizer for Steam Deck. Of course, that doesn’t work which becomes a cause of frustration.
What you need to do is download the Linux version of the Mod Organizer 2. Open your Steam Deck Browser, and search for “Steam Deck Mod Organizer Github” or follow this link.
When on the Mod Organizer Github page, click on the latest version of the Mod Organizer available under the “Releases” tab.
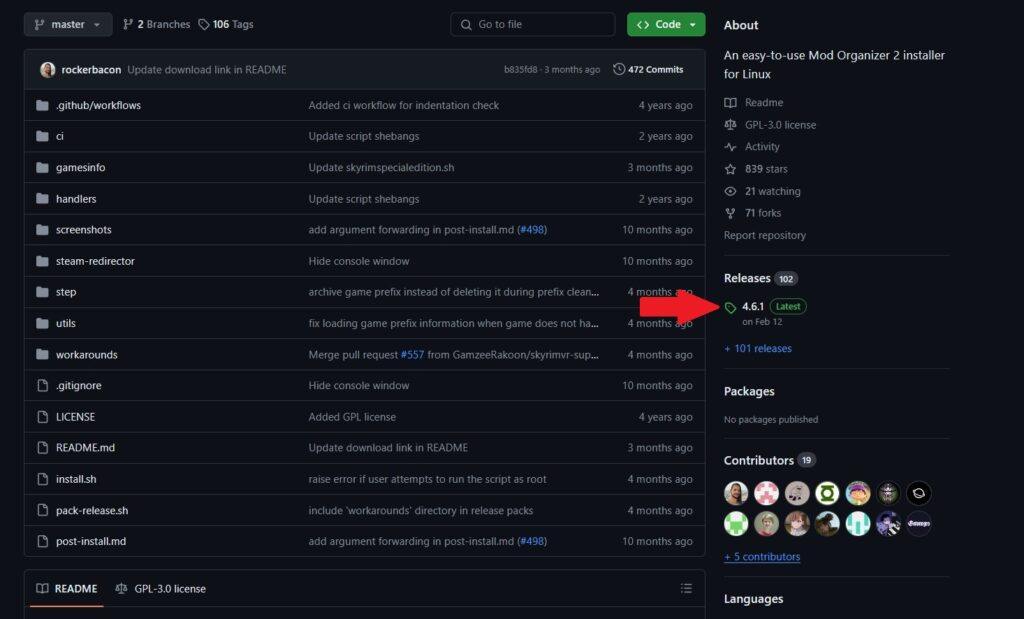
This will take you to the installer page where you can download the latest Mod Organizer installer.

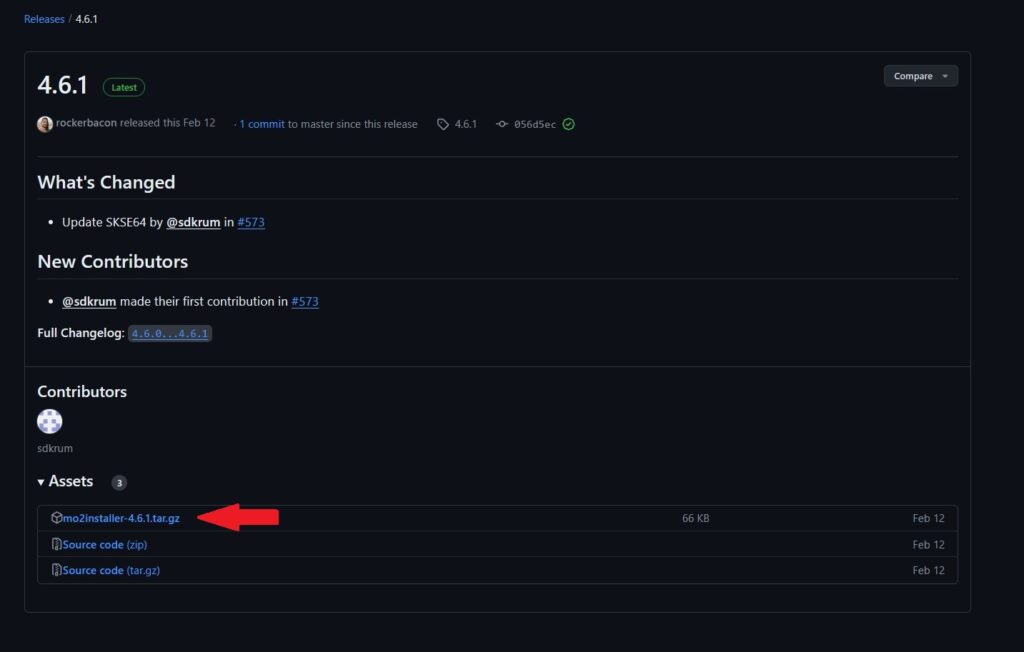
Only click on the Mod Organizer installer file, no need to download the Source Code files.
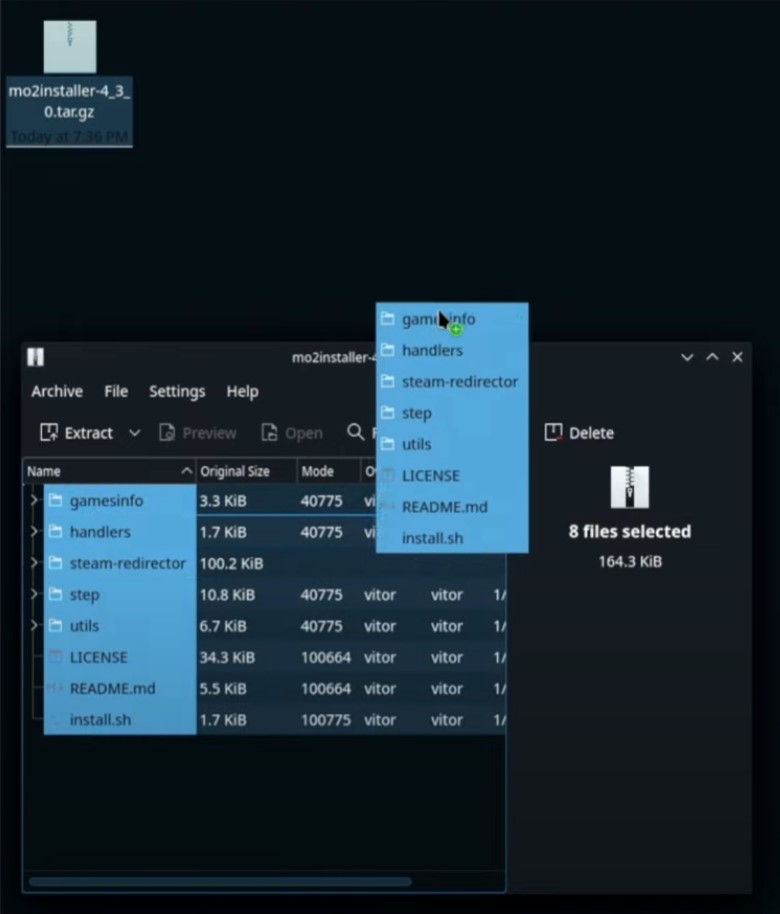
Once the files are downloaded, head to the downloads folder and open the downloaded zip folder. Highlight all files inside the folder and drag them out into your Downloads folder. You can place them anywhere; it DOES NOT matter.
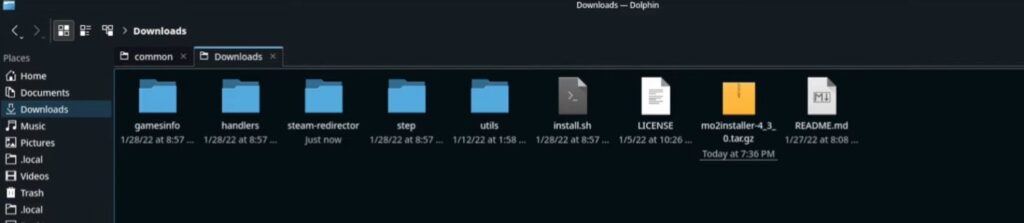
You should see the Install.sh file, right click on it and scroll down to “run in Konsole.”
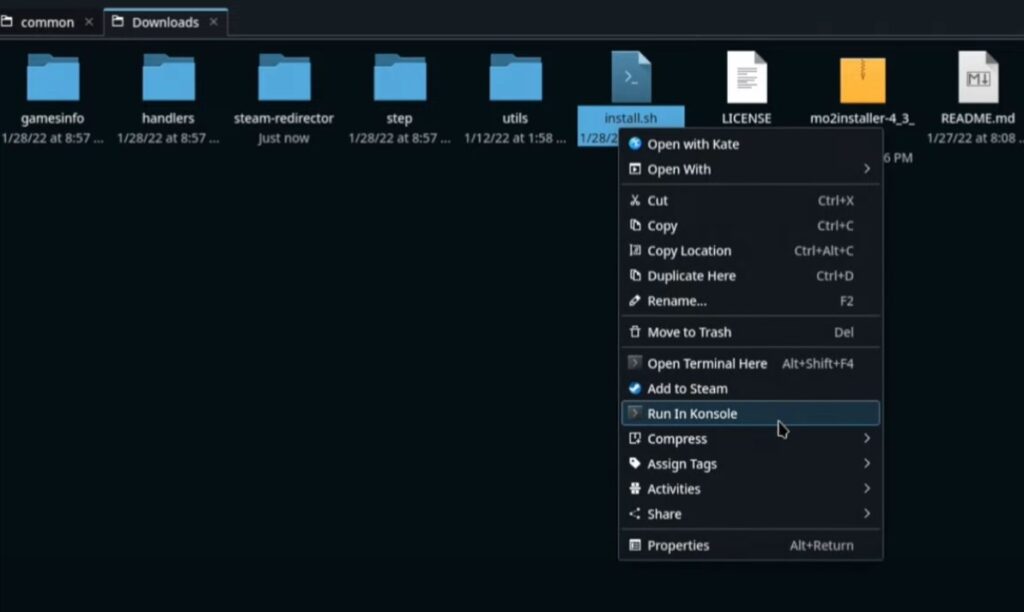
Running it in Konsole is to make sure we’ll stay updated on what type of issues occur, if any.
Now, a new window will pop-up where you can select which game you want to mod. Remember, you can select one game at a time. This will create a different instance of the Mod Organizer 2 for each individual game.

Select the game and click OK.
Follow the on-screen instructions to make sure you match the recommended Proton version. If not, change it.
Note: It goes without saying that the Proton version must match the recommended version from MO2. Usually, it is 6.3.8 but if they have changed it to something else, go with their recommended version.
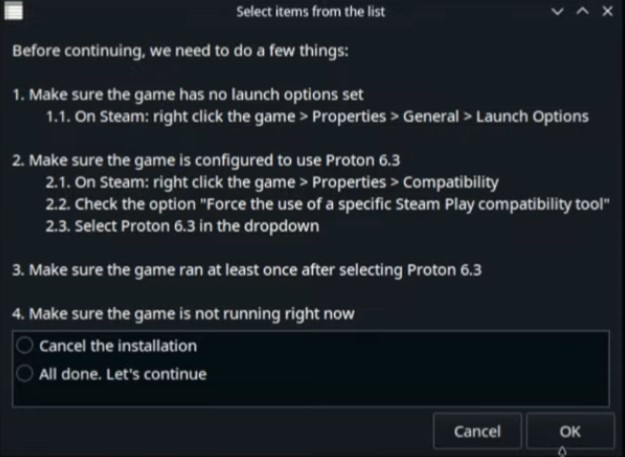
When you’re ready, select “All done. Let’s continue” and then press OK. Press OK again in the next window; keep the directory on default so nothing needs to change in the next window. Just hit OK and the installation will begin.
The installation should be successful but if it is not, refer to the “Common Mistakes” section below for suggestions and possible fixes.
Step #4: Download Fallout 76 Mods
Now it is time to head to Nexus Mods.
Open the Steam Deck Browser and go to Nexus Mods. Download whatever Fallout 76 mod you want. Keep in mind that you’ll need a free or premium account to download the mod files.
Step #5: Run Fallout 76 And Go Through Mod Organizer Tutorial
Now the final steps begin!
Head over to Steam and launch Fallout 76. You will notice that instead, Mod Organizer 2 pops up. Why is that? Because we created an instance for it before. But now we also need to step up that instance.
“Creating a new instance” window will show up. Click “Next” to proceed. If your cursor doesn’t work, you can use the three buttons below the track pad to move the cursor.
- Select “Create a global instance”
- Select Fallout 76 and click “Next”
- Optional: Customize the name of the new instance (keep it default or name it Fallout 76). Click “Next.”
- Select a folder where data will be stored and click “Next.” Keep it on default, nothing should change here.
- Optional: Link your Nexus mods account (recommended) but it’s optional. Connect the account or click “Next.”
Now the Mod Organizer 2 will ask if you want to go through the tutorial. I highly recommend that you do. It allows you to understand different elements and features of the Mod Organizer 2.

After the tutorial ends, you will see the Mod Organizer UI. The “Mod Name” section shows which mods are available and/or ready for activation.
Click on the Disk Icon (pointed out in the image above) to install Fallout 76 mod you acquired from Nexus Mods. Navigate to the mod files you downloaded and “Open” them into Mod Organizer 2.
You don’t need to unzip the mod files folder. Keeping it zipped is fine.
Click “OK” on the Quick Install window to install the mod. Now we have to activate the mod by doubling clicking on it in the “Mod Name” section. You should see a check mark on all mods that are currently activated on Fallout 76.
Finally, click on “Run” (top right) and select “Allow the write once. The file will be set to read only again.”
If everything is done correctly, the game should run fine with your favorite mods.
You can use the same method to mod Fallout 3, Fallout New Vegas, and Fallout 4 as well.
Common Mistakes
- You installed Fallout 76 and/or Mod Organizer on external storage. It is OK to install mods on external storage but never do that with Mod Organizer 2 and the game you’re trying to mode. They should always be on internal storage.
- You’re running the wrong version of Proton.
- You installed multiple mods without checking compatibility (some mods don’t work with each other. Refer to the mod pages to know more).