Running the game in full optimisation is every gamer’s wish, and with the growing popularity of Where Winds Meet, players across different platforms are looking for something like that. Installing Where Winds Meet Lite on the Steam Deck can significantly improve the performance without compromising much.
Many users are using the lite version of the Where Winds Meet report, with an FPS of between 30 and 60. In contrast, the Steam version struggles at 20-30 FPS, often accompanied by stutters. Installing the Lite isn’t that simple; you need to prepare your account, configure the launcher, and complete the setup.
requirements to install Where Winds Meet Lite on the Steam Deck
The first things that you need to do before the installation process are NetEase Account Binding & A USB or Bluetooth keyboard.
- If you were already playing on Steam, then in that case, link your Steam account to your NetEase Games Account. If you don’t do so, the progress will not be transferred to the new lite version of it.
- The lite launcher won’t work with the onscreen keyboard. When you try to log in, you need a wired or wireless keyboard to log in to your account.
How to Link a Steam Account to a NetEase Games Account?
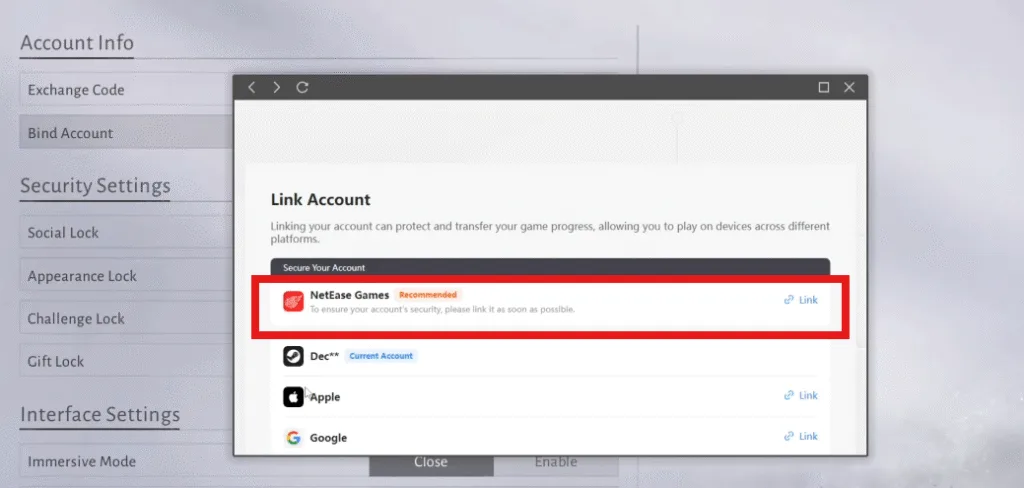
Launch Steam and start the game Where Winds Meet, open the in game settings and go to the other option. From that menu select Bind Account.
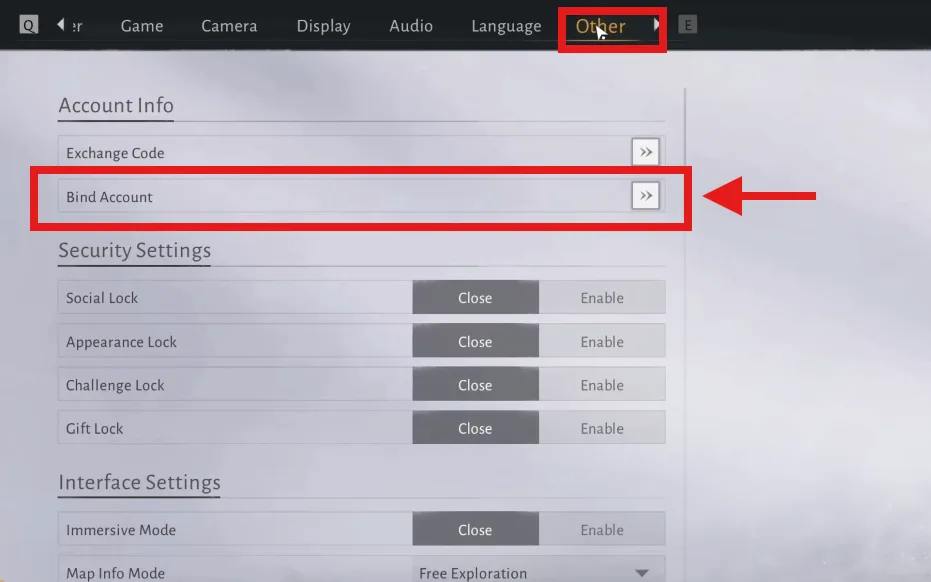
A window will appear after choosing bind account, link NetEase Game account from there.
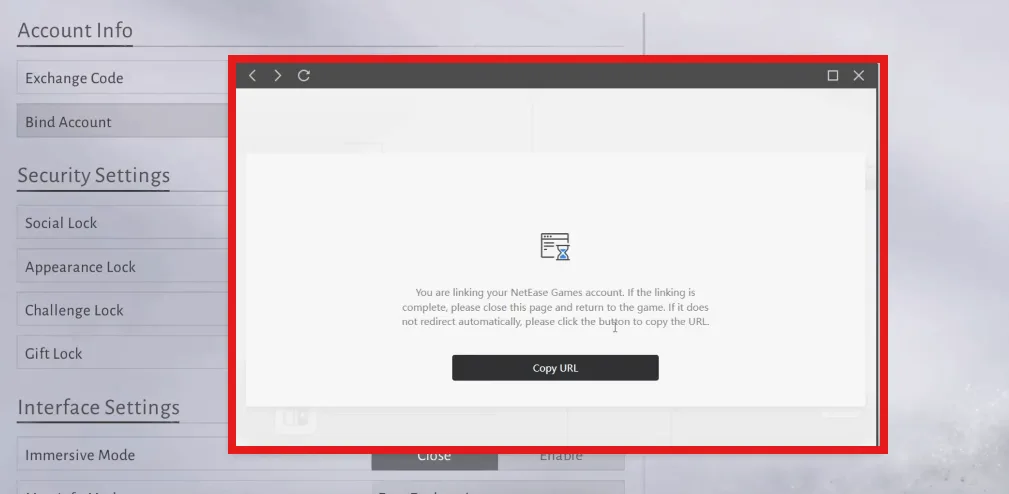
If you are automatically not redirected to the official NeEase Games, then copy the url, close the game and paste it into the webvroweer.
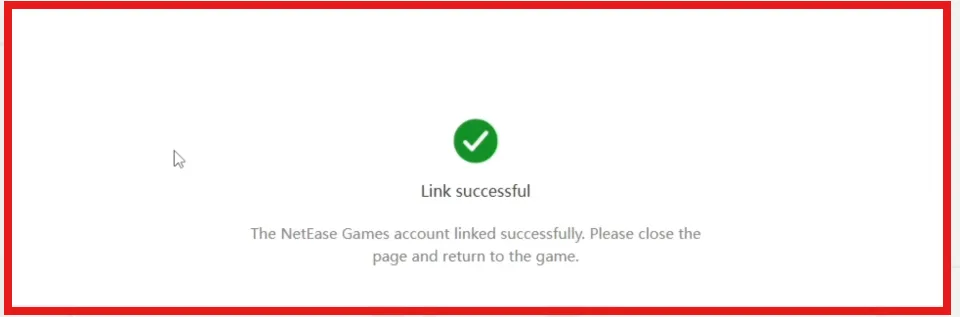
If you already have a NetEase Games account then login and if not then create a new one from here. Once you have logged in you will get a message on screen show ing Link Sucessful.
Download the Lite Client Installer
Once the account is linked now go to the desktop mode and go to the web browser and open the official Where Winds Meet website. And select Play PC Now in the right corner of the screen.

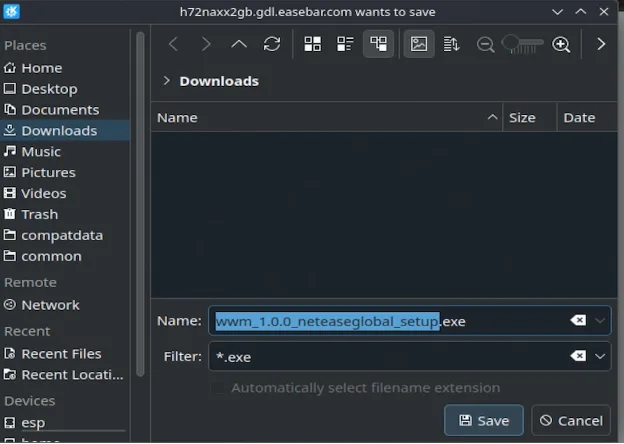
The auto download client will start, and save it to the desired location.
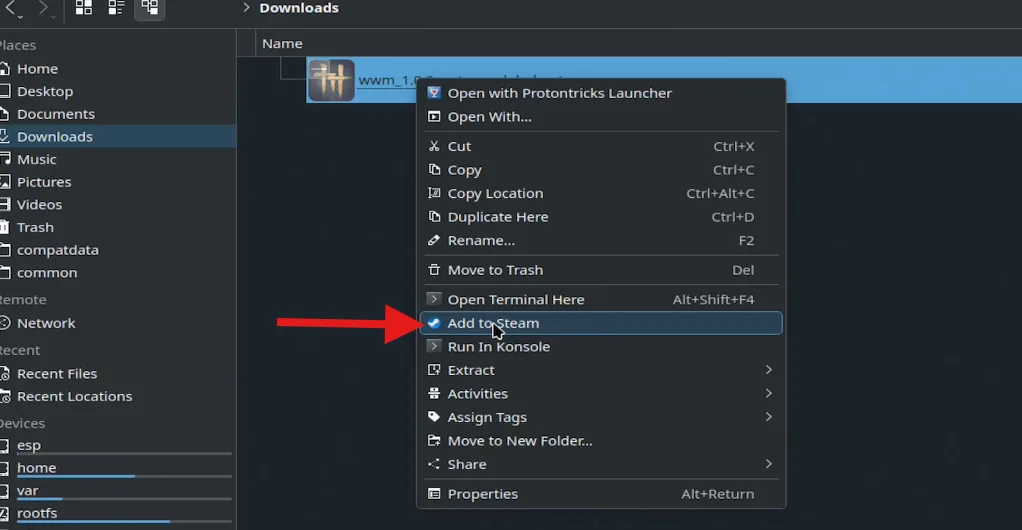
Right-click on the download file with the .exe extension and add it to Steam.
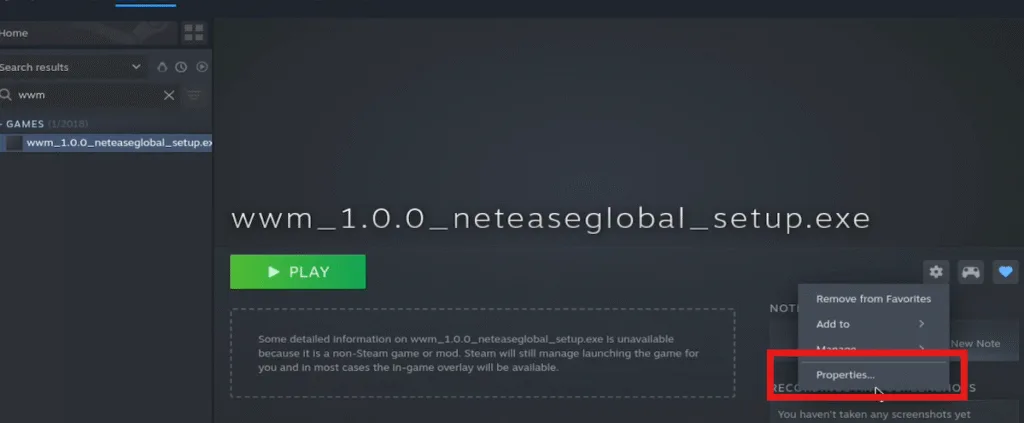
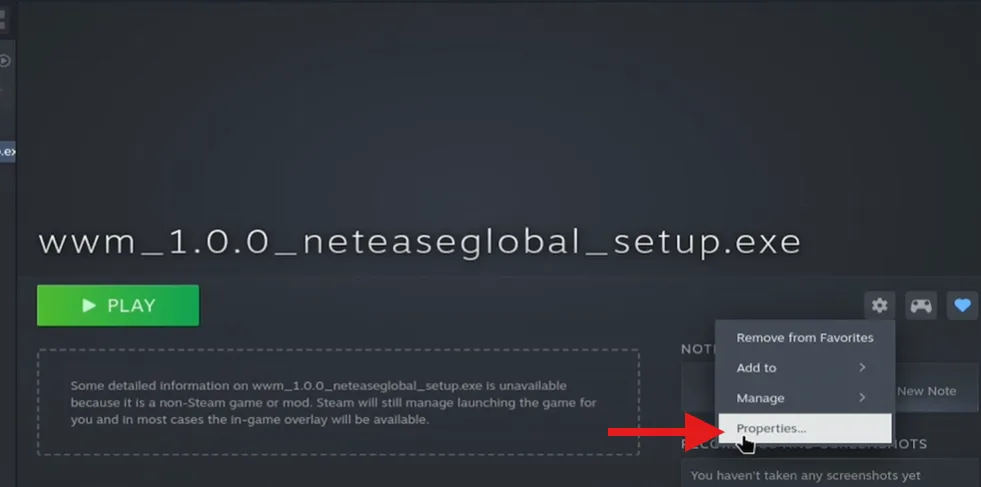
Now open Steam and find the file wwm_1.0.0_neteaseglobal_setup.exe. And select the cog symbol to open the properties of the file.
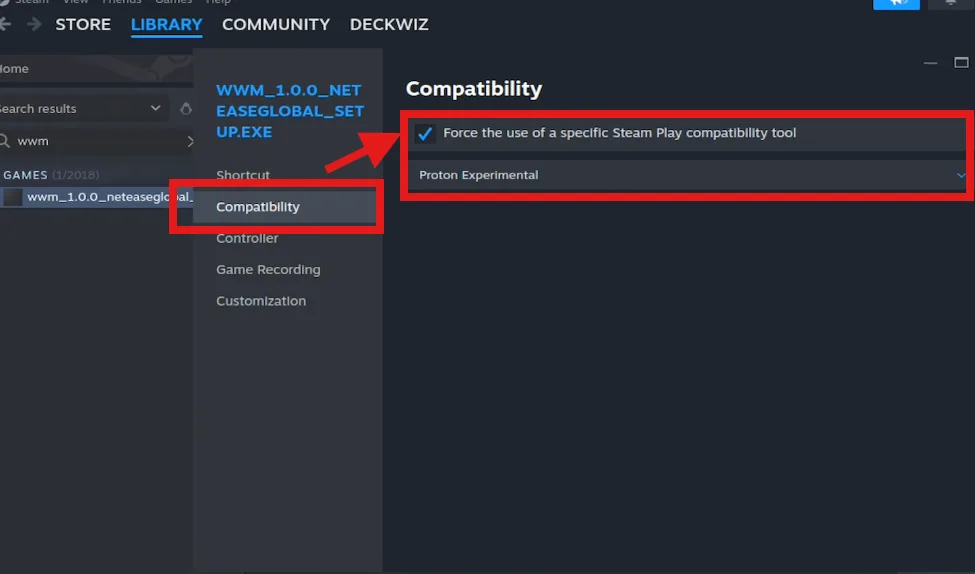
Go down to compatibility, and assign Prtoton experimental by checking the box of Force the use of a specific Steam Play compatibility.
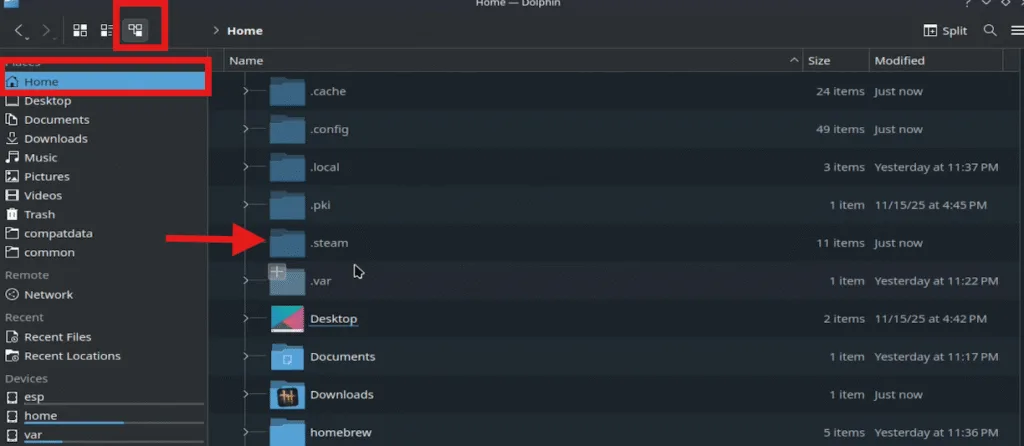
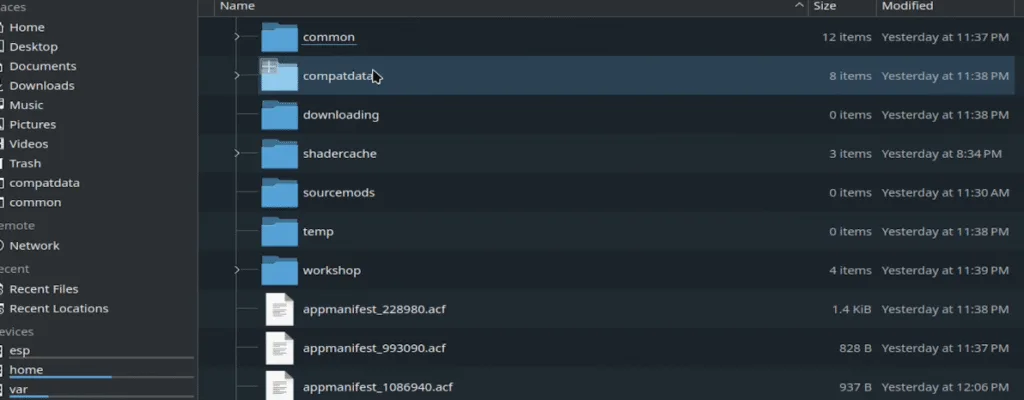
Now open the home folder and unhide all the files in the folder. Open .steam and then steam folder to selct Steam apps.

From the Steam apps folder, open compatdata, where you will see some numbered folders.
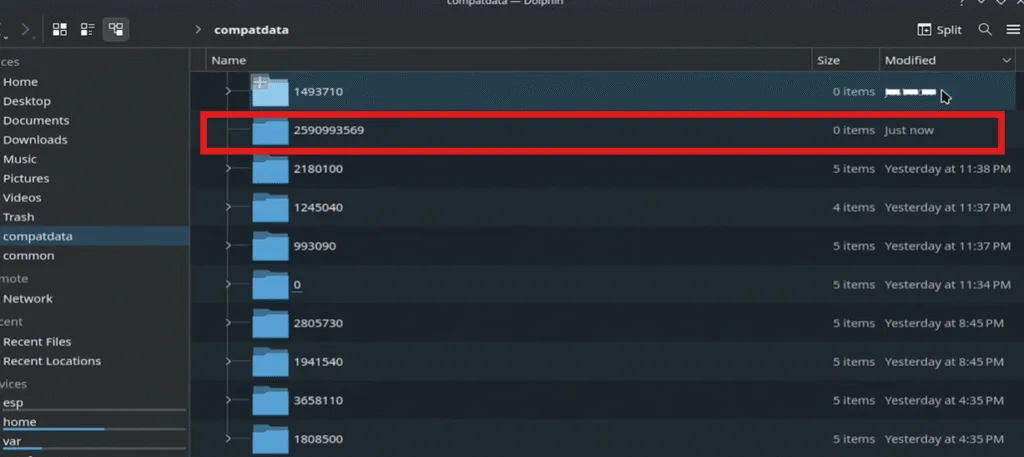
Leave this numbered folder open. Now launch the setup from Steam. When the installer runs, a new numbered folder will appear; this is the game’s new Proton prefix. You need to identify this folder so you can configure the launcher later.
If your trackpad becomes unresponsive, hold down the Steam button to re-enable it. When the installer loads, switch back to the compatdata folder. You should now see a newly created folder marked with the timestamp “just now.” This folder is where the game is going to be installed, so I recommend taking note of this number to configure it later.
Run the Installer and Locate launcher.exe
Now go back to the installer and accept the license agreement. Begin installation. After the setup window closes and a second window appears, simply close it.

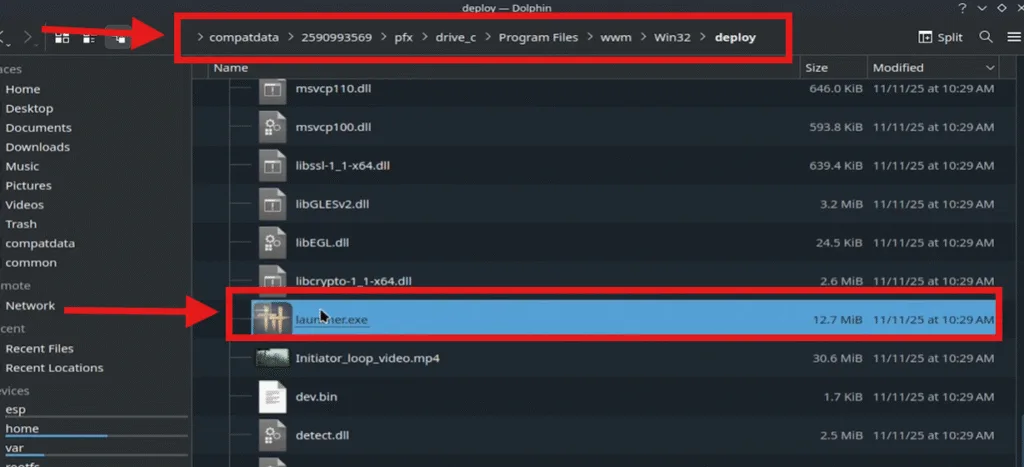
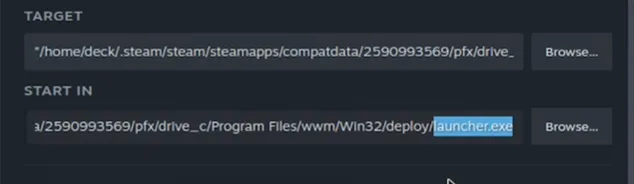
Open the Compatdata folder and open the numbered folder that I recommended taking note of. This number is random for everyone. Navigate through the path as I have given in the image and locate the launcher.exe file.
Numbered folder in compatdata→pfx → drive_c → Program Files → WWM → Win32 → deploy
Configure Steam to Launch the Lite Client Properly
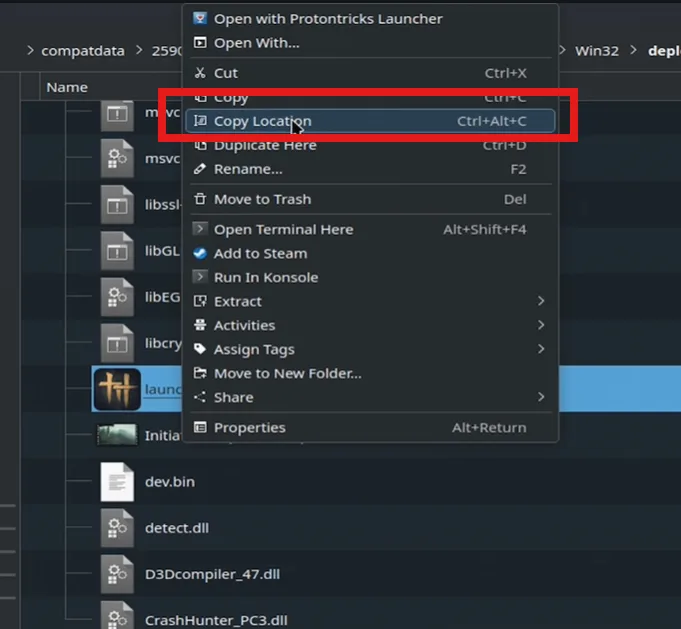
Don’t launch the file just yet, because if you do, you might have to start the process again from scratch. Right-click on the launcher.exe file and copy its location.
Now go back to Steam and again click the cog symbol and configure the properties.
Paste the link that you copied in the target location but between the quotation marks.
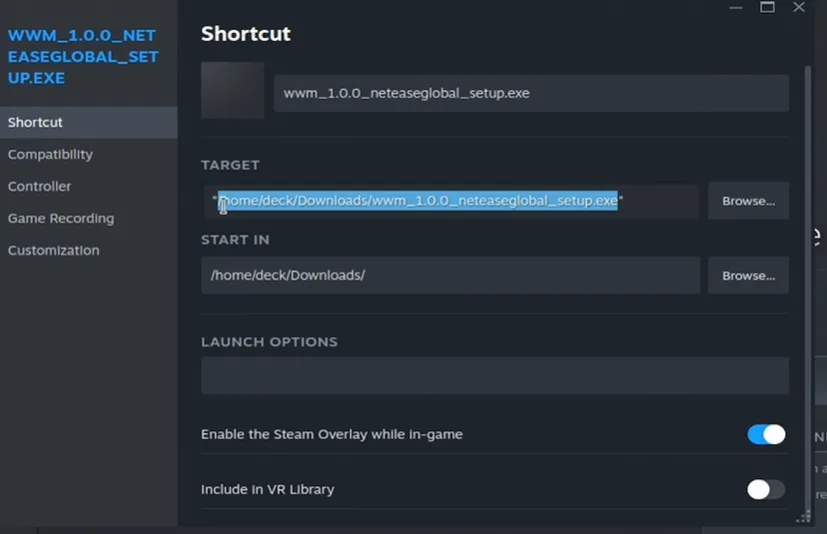
and then paste the same path in the START IN, just delete the launcher.exe from this.
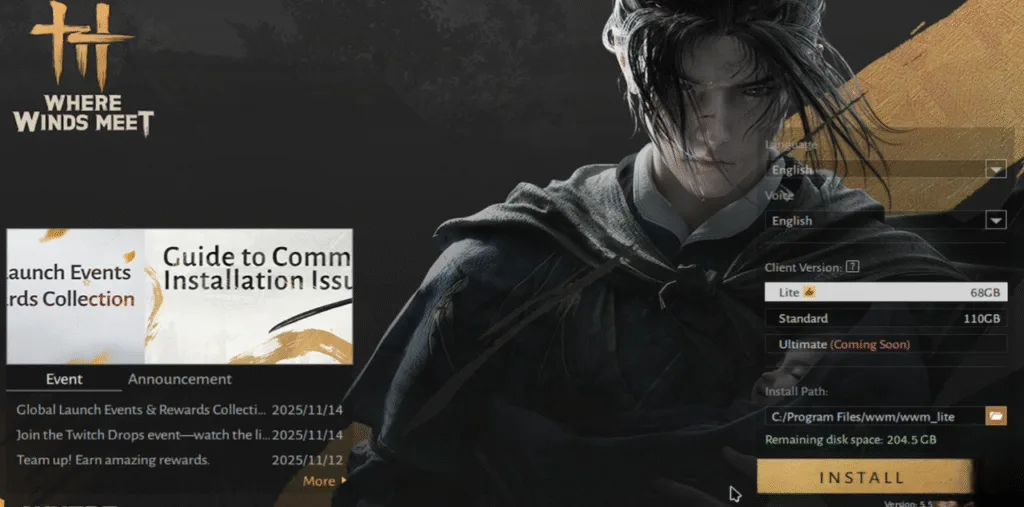
You can also rename the short cut name to Where Winds Meet Lite. If you have done everything right now Launch the game and you will get a choice for client Lite(68 GB) or standard version(110 GB). By deafult Lite version is selected, if not choose it and start the instalation.
When installation begins, a black box may appear. This is normal. Click around it until the window restores itself. When asked whether you want to use an SSD, select No.The game will then begin downloading.
Log into the Game Using a Keyboard
After installation, plug in your USB or Bluetooth keyboard.When the login screen appears, you’ll notice the text fields do not accept input immediately.To fix this, click inside the text field, then click outside on the launcher animation, and then click back inside. Repeat until the cursor flashes, indicating that text input is now active. Enter your email.
You will need to repeat the same process for the password field. After logging in, accept any agreements and let the game initialize.
Return to Gaming Mode for Final Setup
Once the game loads, close it using Alt + F4 or through the menu. Switch back to Steam’s Gaming Mode and launch Where Winds Meet Lite again. If you encounter a black screen, press the Steam button and switch windows to bring up the NetEase login window. Your account should be remembered from the previous step.
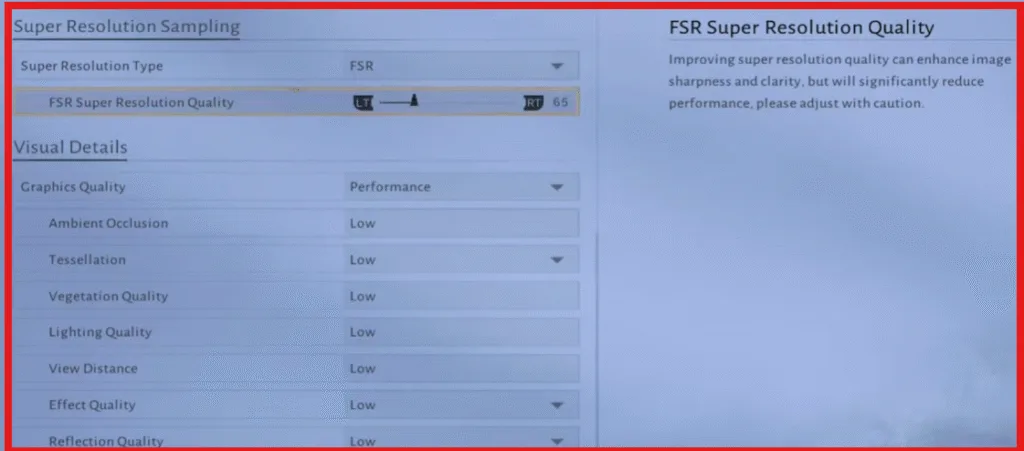
Inside the game, go to the settings menu and switch the performance preset to the first (low settings). Enable FSR and adjust your resolution scaling to approximately 65%. This setup typically results in gameplay around 40 to 50 FPS—far better than the original Steam version.