If you’re planning to emulate games on Apple devices then there is no better emulator, then RetroArch. The great thing about RetroArch is that it works across the board on every Apple device you can imagine.
I even got it to run on an Apple Watch so yeah, it is indeed the best option out there. To step-up RetroArch on Apple devices you first need the usual stuff, your ROMs of course are a part of it.
Setting the RetroArch emulator is pretty simple on Apple TV because it is done through the iPhone or iPad. So, in this guide, lets focus on RetroArch’s installation on iPhone and iPad.
What to do First
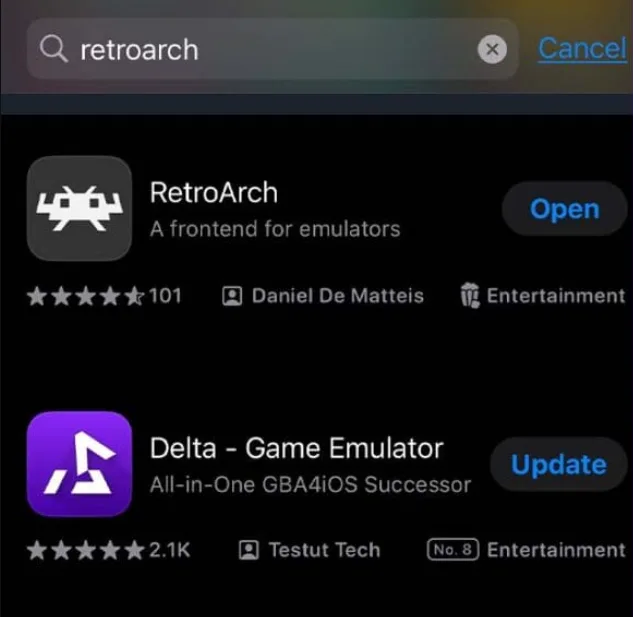
The first thing of course is to download the RetroArch emulator on your iPhone or iPad. You can do this via the App Store; simply search “RetroArch” and you’ll easily find the emulation software.
Once the emulator is downloaded and installed on iPhone / iPad, there are a few things you need to do.
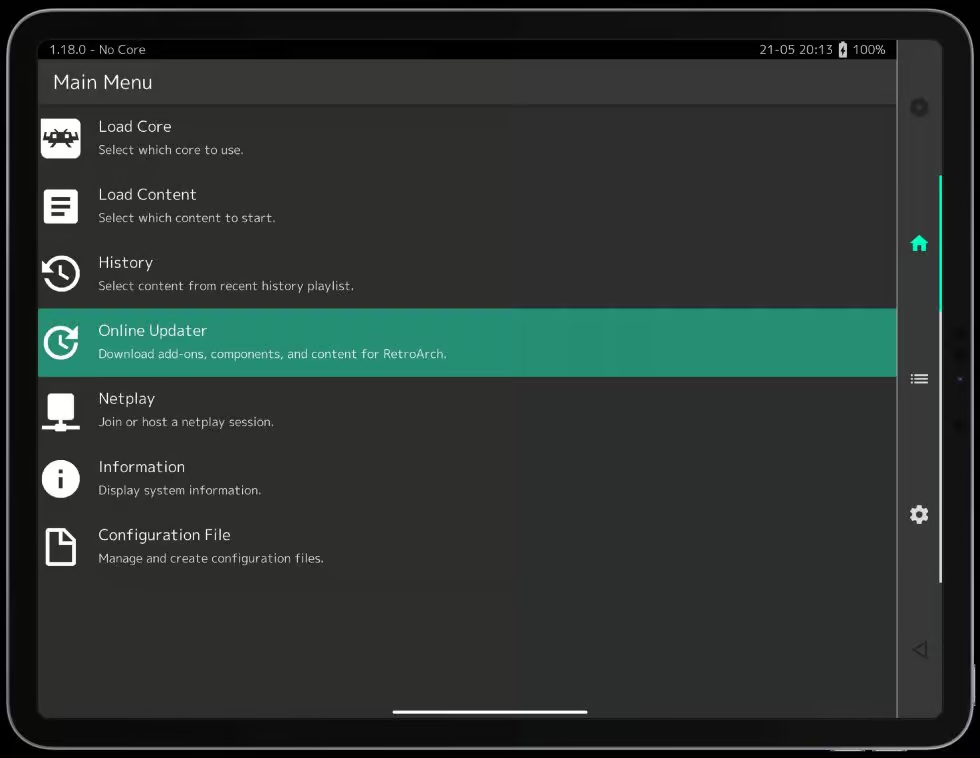
Open the RetroArch emulation app on your Apple device and update the necessary files. Here’s how that’s done:
- Open the RetroArch app on your iPhone or iPad.
- Tap Online Updater.
- Scroll down and tap each of the following:
- Update Core Info Files
- Update Assets
- Update Controller Profiles
- Update Cheats
- Update Databases
- Update Overlays
- Update Slang Shaders
Each file has its own progress bar. Once everything is updated and ready to go you need to add games to RetroArch.
How to Add Games to RetroArch on iPhone and iPad
To add and play retro games on iPhone and iPad you need to put your ROMs in a folder and then transfer them over to the devices.
Transferring is just one thing; the first step is to create a folder and put everything in it the right way.
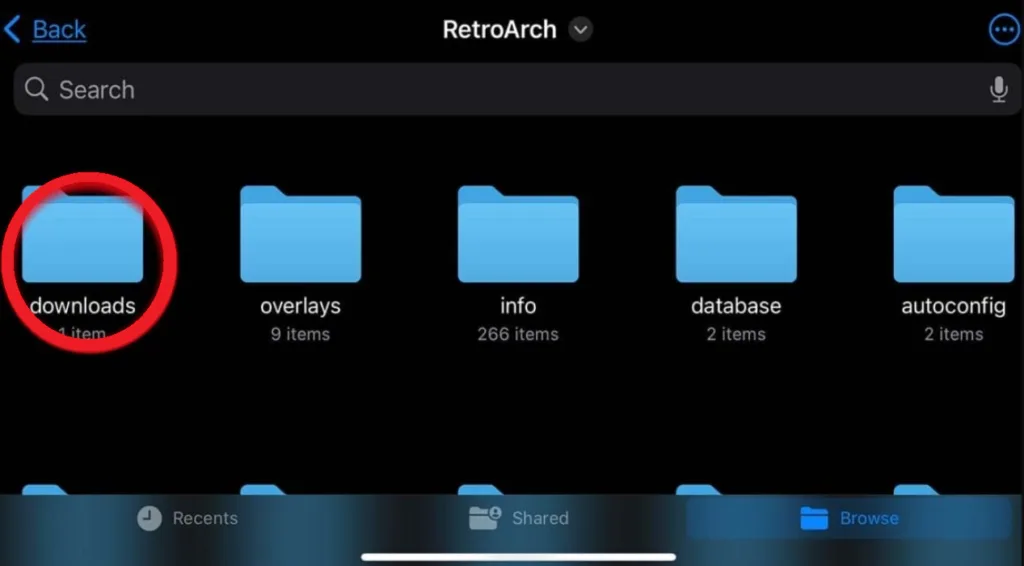
Open the Files app on your device and navigate to On My iPhone/iPad > RetroArch. Create a new folder named “ROMs” to store your game files. I recommend you create the folder inside the Downloads folder:
Files > On My iPhone > RetroArch (Icon on Folder) > RetroArch > Downloads.
You can transfer ROM files directly into the “ROMs” folder using AirDrop, email, or any file transfer method you prefer.
If you are using a Windows PC, then download and install the Apple Devices app on your PC.
Keep your iPhone and iPad unlocked and plug it into your Windows PC. The screen will prompt a message to confirm if you trust the device, click “Trust.”
Enter your device’s passcode and with the Apple Devices app open, choose your device (iPhone or iPad).
Go to the Settings and select Files where you need to scroll through the list of installed apps to find RetroArch.
In the file explorer look for the ROMs folder we created earlier and copy your ROMs into this folder.
I recommend you create little sub folders inside the ROMs folder for each console and handheld you want to play. This way you can better organize your Xbox, PS1, PS2, Nintendo games on RetroArch.
Once the files are files are copied, you need to unplug your Apple device.
Loading Retro Games on iPhone and iPad
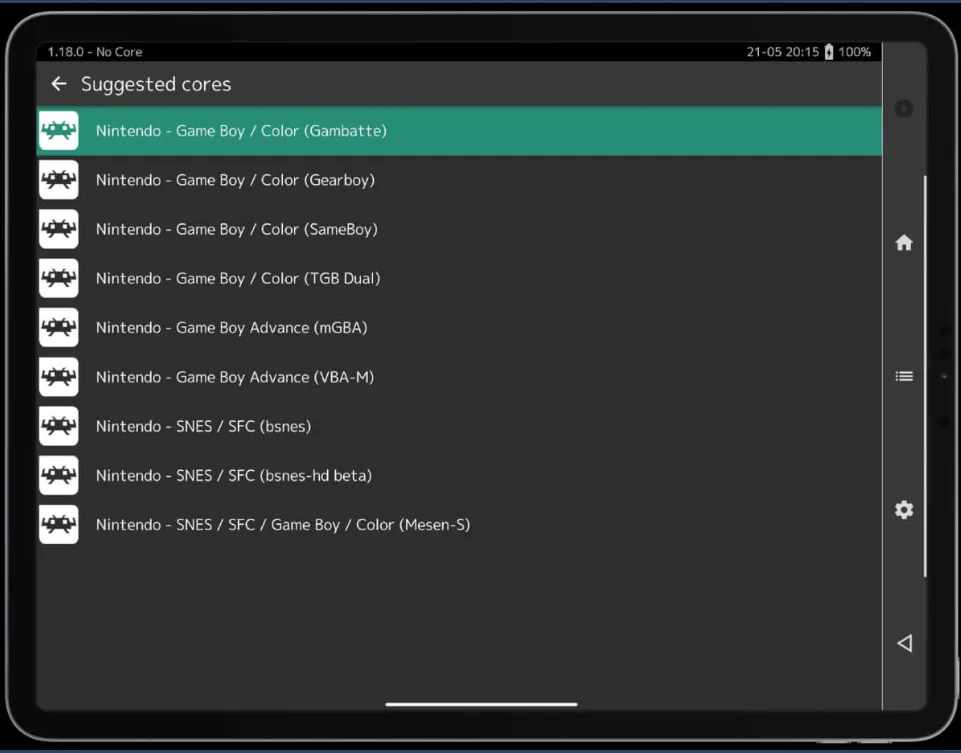
Open the RetroArch app and go to Load Content. Navigate to the “ROMs” folder you created and select your desired game. When prompted, choose the appropriate core (emulator) for your game. If unsure which core to use, you can experiment with different options.
However, RetroArch will suggest different cores that best suit your game. Cores are basically individual emulators within RetroArch. If you are playing an original Xbox games, select the Xbox Core.
Same goes for Gameboy and SNES games.
What Are Cores?
A core is essentially a standalone emulator that has been modified to work within the RetroArch environment. Each core is designed to emulate a specific gaming console or platform, such as the NES, SNES, or PlayStation.
Cores interpret ROM files (the digital versions of games) and mimic the original hardware’s behavior, allowing games to run on modern devices. They handle graphics, sound, and input processing, effectively recreating the experience of playing on the original console.
When you load a game in RetroArch, you select a core that matches the console for that game. For example, if you want to play a Sega Genesis game, you would select the “Genesis Plus GX” core.
You can connect your controller to your iPhone or iPad via Bluetooth or use a compatible controller with Apple TV.
If you prefer using touchscreen controls, RetroArch supports this as well. You can customize these in the settings menu
Apple TV
Go to the App Store on your Apple TV device and download the RetroArch app. Make sure your iPhone / iPad are on the same network as the Apple TV.
Launch RetroArch on your Apple TV. A pop-up will display a local IP address (something like http://<your-ip-address>.local). Use a web browser on your iPhone, iPad, or computer to navigate to this address.
Once you’re in the web interface, locate the Downloads folder. You can drag and drop your ROM / BIOS files into this folder. If you want to organize them, consider creating subfolders for different consoles.
On your Apple TV, go back to RetroArch after uploading your ROMs. Go to Load Content from the main menu. Select Downloads, and you should see your uploaded games listed.
Click on a game, and RetroArch will prompt you to select an emulator core suitable for that game. Choose the appropriate core (e.g., SNES, NES) and start playing.
Fix for Games Running Too Fast on RetroArch
If games run too fast, adjust synchronization settings by going to Settings > Video > Synchronization and selecting “Sync to Exact Content Framerate”
Do You Need BIOS Files to Play Games?
Some emulators require you to use BIOS and of course due to legal reasons I can’t advice the use of BIOS. ROMs on the other hand are read-only memory digital copies of video games. And even with that I can only advice you to use ROMs of Homebrew Games.
But if you do need BIOS, you need to create a BIOS folder inside the System Folder in RetroArch. This is the folder where you will place the BIOS files you acquired legally.
Run a quick only search on BIOS files and where to get them, and you’ll figure it out no problem.
You can then Load Content again via ROMs or BIOS and select the correct core. It’s a pretty simple process in both cases.
If you have any questions or confusion about setting everything up, hit me up on jakesocials@proton.me and I will personally help you set it up.