DX12 works great in most games yet there are developers who decide to turn it off for some reason. Mecha BREAK is one of those games which means players won’t have access to features like frame generation on their GPUs.
If you are not seeing DX12 in Mecha BREAK even though your GPU supports it, you’re not alone. DX12 is turned off by the game’s developers but we are going to turn it on today.
Yes, using a few simple steps you can enable DX12 in Mecha BREAK.
How to Enable DX12 in Mecha BREAK
Developers of Mecha BREAK confirmed that DX12 only works with RTX 4070 Super and above GPUs. But we are going to change this and make it work on most GPUs that support DX12.
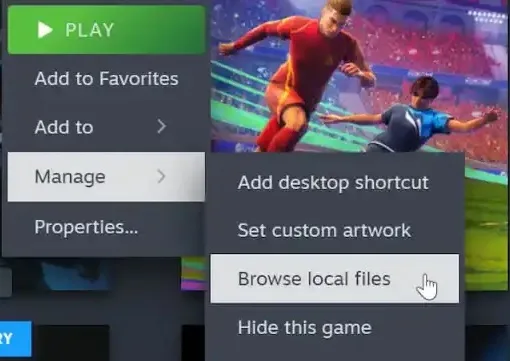
Open Steam and right click on Mecha BREAK. Then Select Manage and click on Brows Local Files. This will take you to the game’s installation directory. You can go there directly if you know where the files are.
Find the following directory:
- \MechaBREAK\Game\MechaBreak\Oversea
Find the file named TargetGfxRenderer.config and open it with a text editor (like Notepad). Find and change the line that says DX11 to DX12. Save the file and close the editor, and you’re done!
Your graphics card has to support DirectX 12 before you can launch the game in that mode. If you’re still using something like a GTX 700 series card, the title simply won’t start with DX12.
Even if the launcher shows DX11 up-front, you’ll notice a shader compile sequence at startup; that usually means DX12 is already kicking in. A quick peek with Rivatuner (if you have it), though, gives the clearest answer. Look for D3D12 instead of D3D11 in the overlay of Rivatuner.
The official guideline limits DX12 to cards around RTX 4070 Super or stronger and argues that 16 GB VRAM is a must. Still, the tweak outlined here sidesteps that lock so eligible, but lesser hardware can join the party.
Keep in mind, DX12 in Mecha BREAK is still experimental, so it may drop frames or crash more often than DX11.