No Rest for the Wicked is an action RPG that offers a blend of combat and exploration. The game’s reviews are pretty good as well, with a 9/10 rating on Steam. That’s all good, but what if you just can’t enjoy the game? That’s what has been happening to players, with reports claiming that No Rest for the Wicked crashes while playing. In this No Rest for the Wicked guide, I will walk you through how to fix the in-game crash issue on your Windows PC.
No Rest for the Wicked In-Game Crash on PC Fixed
Linux users report that the crashes started after playing the Hotix 2 Version of the game on Bazzite. In general, the game is crashing randomly while playing. For some players, No Rest for the Wicked keeps crashing after entering the first boss area. Follow this guide to ensure No Rest for the Wicked doesn’t crash on your PC.
Fix #1: Change your DLSS preset to Model E (Confirmed Fix)
After trying several fixes, players have found the right one. Changing your DLSS preset to Model E has seemed to work for several players and will definitely fix No Rest for the Wicked crashing on your PC. Follow my lead:
- Make sure that your NVIDIA app and drivers are up-to-date.
- Launch the application and make your way to the Global Settings tab.
- Select DLSS Override – Model Presets.
- Choose the “Custom” option.
- Select E from the list for “Super Resolution”t and restart your PC.
- Launch No Rest for the Wicked, and the in-game crashes are gone.

Fix #2: Limit No Rest for the Wicked Max Framerate
High FPS is the reason why No Rest for the Wicked is crashing on your PC. There is just too much stress on your components because of that. To fix the issue, all you have to do is limit No Rest for the Wicked’s max framerate. There are two methods to do that, and I will explain both of them:
Through In-Game Settings:
- Launch No Rest for the Wicked and open the Settings.
- Navigate to the Display tab.
- Turn the Framerate Cap option on and set a lower value for it.
- Continue playing No Rest for the Wicked, and the crashes are fixed.

Through the Nvidia App:
- Open the NVIDIA App and go to the “Graphics” tab.
- Select No Rest for the Wicked from the list. (If the game isn’t in the list, then go to the Global Settings tab)
- Scroll down to “Driver Settings” and use the “Max Frame Rate” setting.
- Set a lower FPS value and apply the changes.
- Play No Rest for the Wicked, and the in-game crashes are fixed.

Unless you are playing No Rest for the Wicked on a Gsync or Freesync display, the frame rate value should be 1/2, 1/3, or 1/4th of your display refresh rate, otherwise, the game will feel jittery. This only applies if you have V-Sync enabled on a fixed refresh rate monitor.
Fix #3: Revert RAM Overclock
You have probably enabled the XMP or EXPO settings on your BIOS, which ensures the installed RAM sticks in your PC are utilized to their full potential. It is sort of an overclock, and that’s why No Rest for the Wicked keeps crashing on your PC during gameplay. All you have to do is open the BIOS and disable these settings. Don’t worry, I’ll take you through the process.
- Open the Windows Settings> Windows Update tab> Advanced Options> Recovery.
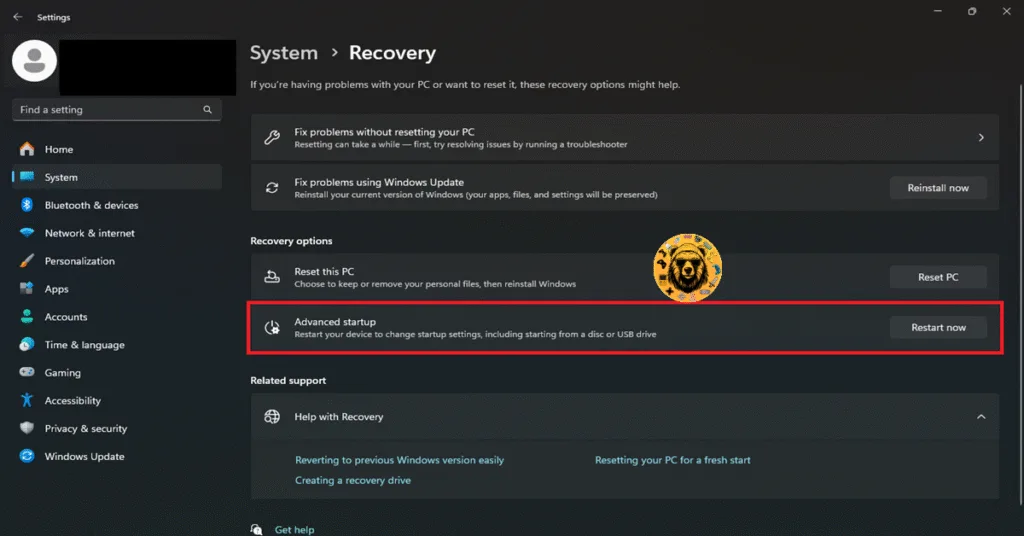
- Click on the Restart Now option and wait for your PC to restart.
- Select Troubleshoot> Advanced Options> UEFI firmware settings.
- Now, your PC will restart and boot into BIOS.
- Press F to switch your BIOS from EZ Mode to Advanced Mode.
- Locate the OC (Overclocking) or Extreme Tweaker tab and find the XMP Profile or EXPO Profile settings.
- Disable it and press F10 to save the changes.
- Exit the BIOS and let your PC restart.
- Continue playing No Rest for the Wicked, and crashes are fixed.
Fix #4: Revert the GPU to its Default Clocks
Have you overclocked your GPU for a performance boost? If so, then that’s what’s causing your games to crash with different errors and issues. To fix No Rest for the Wicked’s in-game crashes, you will have to revert your GPU to its default settings.
However, if you haven’t overclocked the GPU, then there is a high chance that it’s already overclocked by Nvidia’s AIB partners like ASUS, Zotac, MSI, etc. To ensure that your GPU runs on Nvidia’s recommended clock speeds, you will have to enable Debug Mode. Here’s how to do that:
- After opening Nvidia’s Control Panel, click “Help” in the top menu.
- Choose Debug Mode and enable it.
- Play No Rest for the Wicked, and the crashes will be fixed.

And that should resolve the in-game crashes while trying to play No Rest for the Wicked on PC. If you are having trouble with other game issues and errors, then feel free to check our site for more errors and their fixes.