The Outer Worlds 2 is another Unreal Engine 5 game to be released for PC and consoles. Despite UE5’s reputation, The Outer Worlds 2 is one of the better-optimized games for PC. But that doesn’t mean the game is free of crashes and errors, as PC users report LowLevelFatalError crashes and Out of Video Memory crashes. Aside from these, Fatal Error crashes are quite prevalent in the PC version of The Outer Worlds 2, and to help you fix these crashes, I have compiled a comprehensive list of fixes.
7 Ultimate Fixes For The Outer Worlds 2 Fatal Error Crash
PC users report that The Outer Worlds 2 keeps crashing on their PC during gameplay and displays the following error message:
UE – Arkansas Game has Crashed
Fatal Error!
There are multiple reasons you are experiencing these Fatal Error crashes while playing The Outer Worlds 2, such as playing the game at an unlocked framerate, Hardware Raytracing putting the GPU under a lot of stress, issues with the game’s shader cache, and more. The following fixes will resolve the UE – Arkansas Game has Crashed Fatal error on your Windows PC.
Fix #1 – Play The Outer Worlds 2 With a Capped FPS
Playing games at a high or unlocked FPS has become the norm, as even the consoles allow players to play games at 120 FPS. A high FPS is a game-changer, as the game not only feels smooth when playing, but it also reduces input latency, which allows for a fast reaction time in the game.
However, playing games at an unlocked or high FPS puts the GPU and CPU under a lot of stress, which often results in games crashing to the desktop. If you are playing The Outer Worlds 2 at an unlocked FPS, it is the reason for the Fatal Error crashes on your PC. To fix these UE Fatal Error crashes, limit The Outer World’s max framerate, which you can do by enabling Vertical Synchronization (V-Sync), using the in-game FPS limiter, or using the NVIDIA App FPS limiter.
Enable Vsync (If Disabled)
Some PC users play games with Vsync disabled, especially multiplayer ones, as it allows the game to render as many frames regardless of the refresh rate.
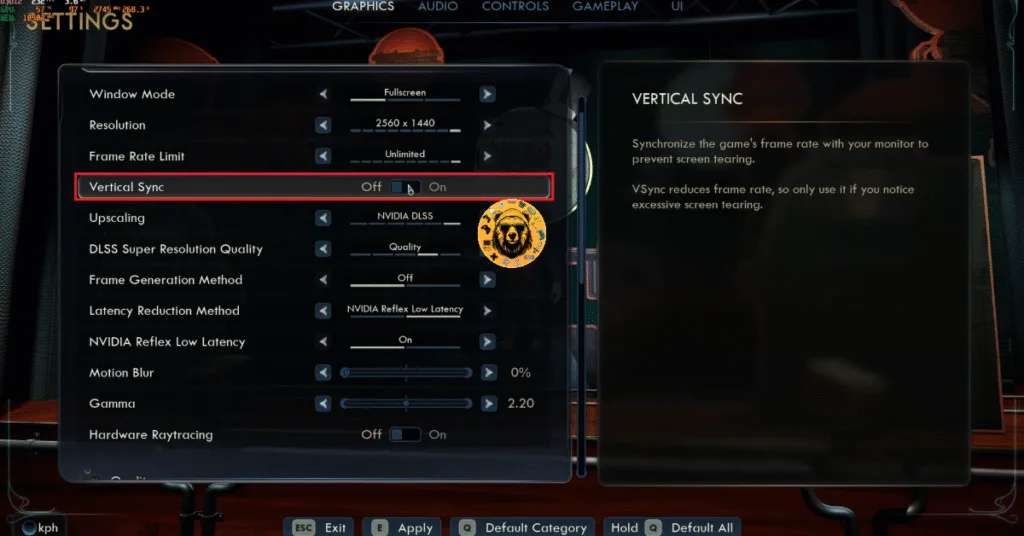
If you are playing The Outer Worlds 2 with Vsync disabled, it is the reason for the Fatal Error crashes on your PC. You can fix these UE Fatal Error crashes by enabling Vsync, as it will limit the game’s FPS to match the monitor’s refresh rate. However, you might experience a slight increase in input latency. Here is how you can enable Vertical Synchronization in The Outer Worlds 2 to fix the UE Fatal Error on your PC:
- Go to the options menu in The Outer Worlds 2 and select the “Settings” option.
- Go to the “Graphics” tab.
- Toggle the “Vertical Sync” setting on and apply the change.
- The game’s FPS will be locked to match your monitor’s refresh rate, which reduces the GPU and CPU load.
- Continue playing The Outer Worlds 2 and the UE – Arkansas Game has Crashed error is fixed.
Use The Outer Worlds 2’s In-Game FPS Limiter
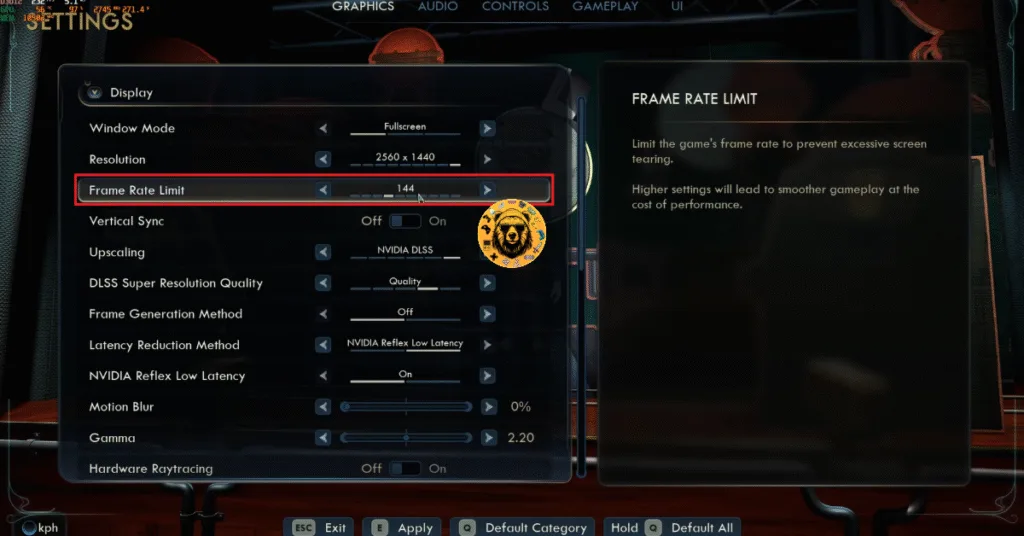
If you are using a high Refresh Rate monitor, enabling Vsync might not fix the Fatal Error. You can use The Outer Worlds 2’s in-game FPS limiter to cap the FPS to a lower value and fix the Fatal Error crashes on your PC. Here is how you can use the in-game FPS limiter:
- Go to the options menu in The Outer Worlds 2 and select the “Settings” option.
- Go to the “Graphics” tab.
- Use the “Frame Rate Limit” setting to set a lower FPS value.
- Apply the change and play The Outer Worlds 2.
- The Fatal Error crash is now fixed on your PC.
Use NVIDIA App FPS Limiter
The in-game FPS limiter for The Outer Worlds 2 offers limited FPS values. For a more granular control over the FPS, you can use the NVIDIA App’s FPS limiter to fix the Fatal Error.
- Open the Nvidia App and select the “Graphics” tab.
- Select “The Outer Worlds 2” from the list of games.
- Scroll down the options and click on “Max Frame Rate”.
- Turn it on and set a value for it.
- Apply the change, continue playing The Outer Worlds 2, and the UE Fatal Errors are now fixed.
Unless you are playing The Outer Worlds on a Gsync or Freesync display, the frame rate value should be 1/2, 1/3, or 1/4th of your display refresh rate, otherwise, the game will feel jittery. This only applies if you have V-Sync enabled on a fixed refresh rate monitor.
Fix #2 – Disable Hardware Raytracing in The Outer Worlds 2
Ray Tracing can give a game’s visuals a realistic look, however, it requires a powerful GPU to run, and even then, you’ll need to use DLSS, FSR, or XESS upscaler to get a good FPS. If you are using Hardware Raytracing in The Outer Worlds 2, it is the reason the game keeps crashing on your PC during gameplay and displays the Fatal Error message.
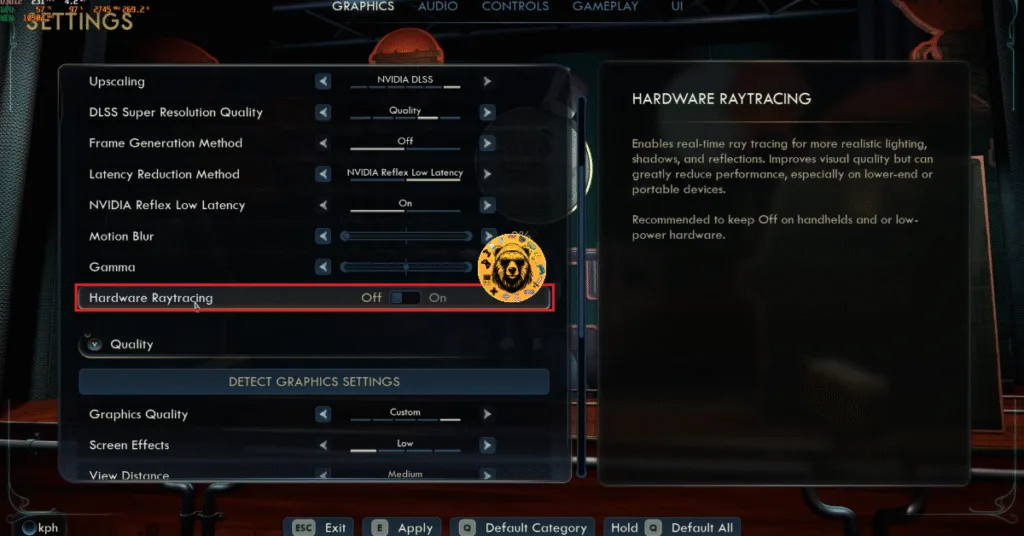
You can fix the Outer Worlds 2 Fatal crashes on your PC by disabling Hardware Raytracing. This will not disable ray tracing, but will shift the game to a software-based ray tracing solution. Here is how you can turn off Hardware Raytracing in the Outer Worlds 2 to fix the Fatal Error crashes on your PC:
- Go to the options menu in The Outer Worlds 2 and select the “Settings” option.
- Go to the “Graphics” tab.
- Scroll down to the “Hardware Raytracing” setting and toggle it off.
- Play The Outer Worlds 2 and the UE – Arkansas Game has Crashed error is now fixed.
Fix #3 – Rebuild The Outer Worlds 2’s Shader Cache and Increase Its Size
Unreal Engine is known for its use of shaders, partly because of the Shader Compilation stutters in PC games that use the engine. The Outer Worlds 2 is built on Unreal Engine 5, hence it relies heavily on shaders for its visuals and performance. The shaders are stored in a cache, and the cache is likely the reason The Outer Worlds 2 keeps crashing on your PC and displays the Fatal Error message.
Some PC users, however, experience Out of Video Memory crashes in The Outer Worlds 2 during shader compilation, which is also due to the shader cache size.
You can fix the UE Fatal Error crashes in the game by clearing the NVIDIA Shader Cache, increasing its size, and recompiling the shaders in Outer Worlds 2. Here is how you can apply the fix:
- Open the NVIDIA Control Panel.
- Click the “Manage 3D settings” option from the left menu.
- Go to the “Global settings” tab.
- Scroll down to the “Shader cache size” setting and select the “Disable” option.
- Apply the change and restart your PC.
- Go back to the “Shader cache size” setting and select 10 GB or a higher value.
- Apply the changes, play The Outer Worlds 2 on your PC, and it won’t crash with a fatal error again.

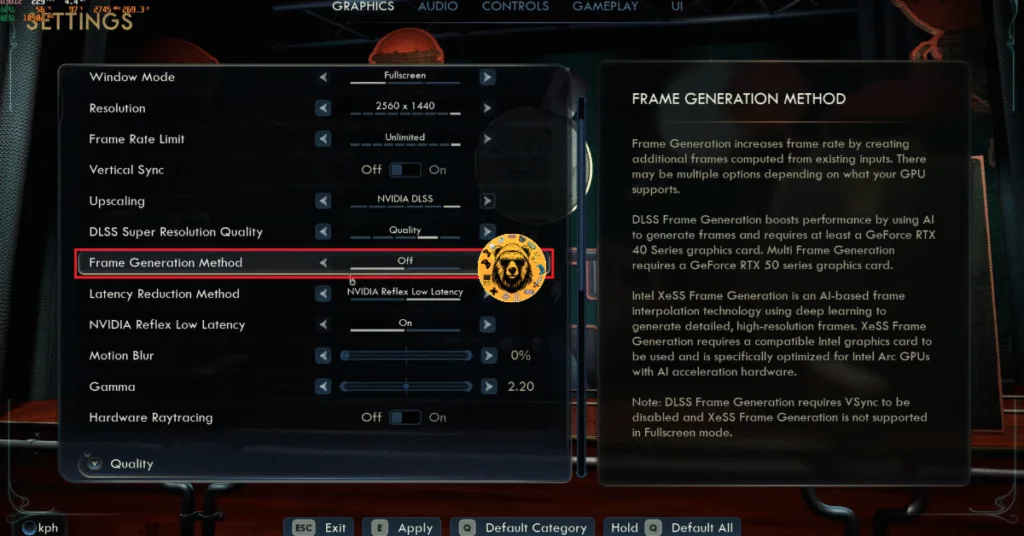
Fix #4 – Disable Frame Generation
Frame Generation is a technique that generates AI frames in between rendered frames. It gives the illusion of games running at a high FPS. However, the use of Frame Generation is the reason The Outer Worlds 2 is crashing on your PC with the Fatal Error. This is quite common in UE5 games, and The Outer Worlds is no exception. To fix the Fatal Error crashes in the game, disable Frame Generation. Here is how you can apply the fix:
- Go to the options menu in The Outer Worlds 2 and select the “Settings” option.
- Go to the “Graphics” tab.
- Use the “Frame Generation Method” settings to turn on Frame Generation.
- Apply the changes, continue playing The Outer Worlds 2, and the UE Fatal Error crashes will be fixed.
Fix #5 – Install or Repair Damaged or Missing Visual C++ Components and System Files
Missing or damaged system files and Visual C++ components on your PC are crashing The Outer Worlds 2 with a UE Fatal Error. You can fix these Fatal Error crashes by repairing system files and installing missing or corrupt Visual C++ Components. Here is how you can do both:
Repair System Files
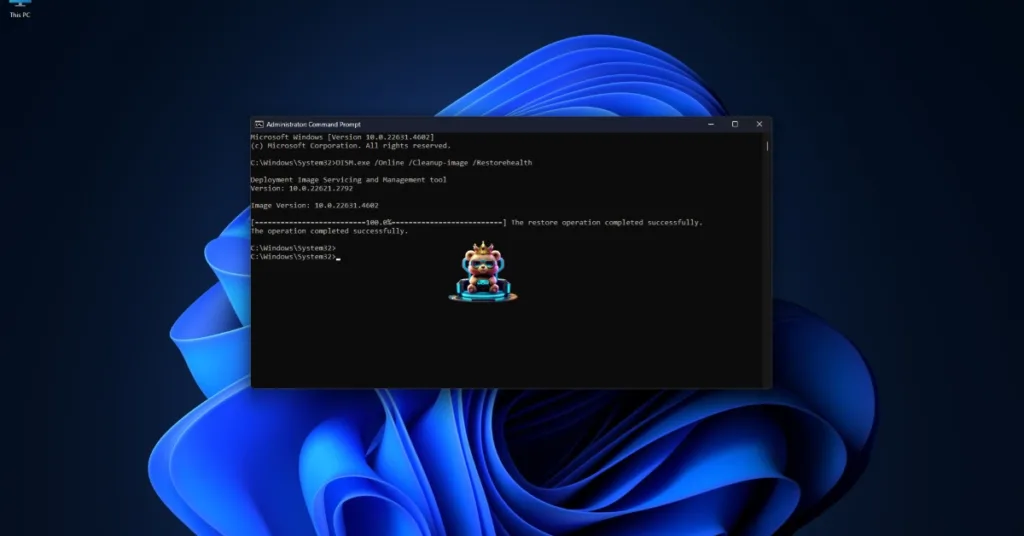
Windows has built-in DISM and SFC scans that verify if the system files are OK. If any system file is missing or corrupt, they recover it. Run these scans to repair system files to fix the Fatal Error crashes on your PC. Here is how you can run the DISM and SFC scans:
- Press the Windows key on your keyboard, type “cmd”, and run Command Prompt as an administrator.
- Type sfc /scannow and hit Enter.
- Windows will run a scan. Let it complete fully.
- After the first scan is complete, type DISM.exe /Online /Cleanup-image /Restorehealth and press Enter again.
- Let Windows complete this scan as well.
Install or Repair Visual C++ Components
Visual C++ is a necessary component to run games on Windows, and you are experiencing The Outer Worlds 2 Fatal Error crashes due to corrupt or missing Visual C++ files. You can fix these crashes by installing or repairing Visual C++ components. Here is how you can apply this fix:
- Go to the Steam Library and type “Steamworks” in the search bar.
- Right-click “Steamworks Common Redistributables” > Manage > click “Browse local files”.
- Open _CommonRedist\vcredist in the explorer window that opens on your screen.
- You will get a list of folders with names in years starting from 2010.
- Open each folder one by one and run the VC_redis for both x64 and x86 versions.
- Repair or install Visual C++ Redistributables.


You might find some folders empty for Visual C++ installers, as Steam deletes installers after a certain time. In that case, you can manually download installers for Visual C++ Redistributables and install them. Ensure that you download and install both x86 and x64 versions. After installing, restart your PC, play The Outer Worlds 2, and the UE Fatal error will be fixed.

Fix #6 – Play The Outer Worlds 2 in Windows 8 Compatibility
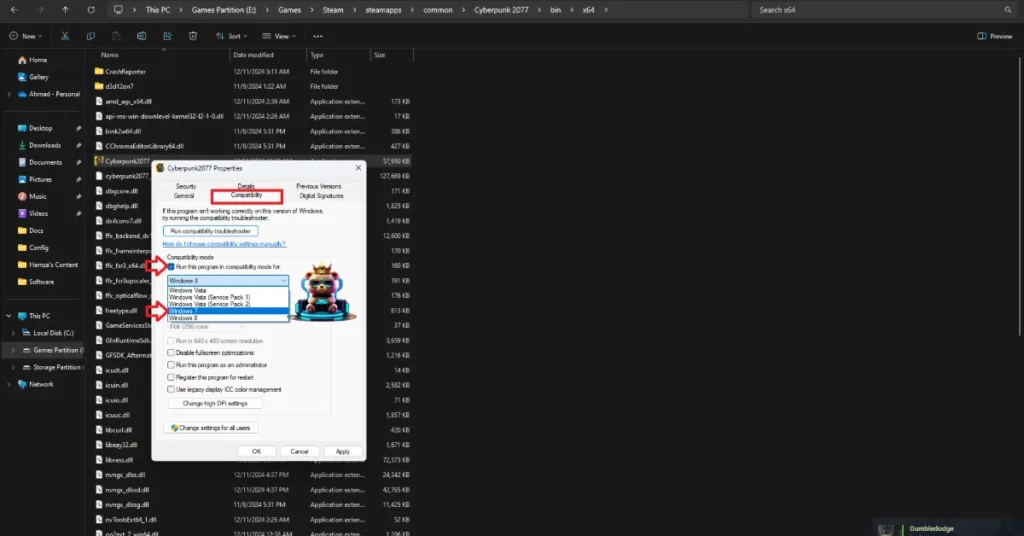
Windows compatibility issues are often the reason PC games crash and display a Fatal Error. You can fix the Outer Worlds 2 Fatal Error crash by running the game in Windows 8 compatibility. This fix has worked for other UE5 games, such as Little Nightmares 3 and RoboCop: Unfinished Business. Here is how you can run the game in Win 8 compatibility mode:
- Right-click The Outer Worlds 2 in your Steam library > Manage > click the “Browse local files” option.
- A new Explorer Window will open containing the game’s files.
- Right-click the “TheOuterWorlds2-Win64-Shipping” executable and select the “properties” option.
- Click the “Compatibility” tab and check the option “Run this program in compatibility mode for”. Click the dropdown button below this option and select Windows 8.
- Play the game, and the Fatal Error crashes are now fixed.

Fix #7 – Revert Graphics Card Overclock
One of the advantages of PC gaming is that users can overclock their hardware to squeeze more in-game performance out of it. However, Overclocking can make gaming an unstable experience as games often crash to the desktop. If you have overclocked your graphics card, it is crashing The Outer Worlds 2 on your PC with a Fatal Error message. Revert the graphics card to its stock GPU and Memory clocks to fix the error.
However, most graphics cards from NVIDIA and AMD AIB partners use higher GPU and Memory clocks than their respective reference models.
This means that even if you haven’t overclocked your graphics card, it is still using higher clocks. These higher clocks are the reason for Fatal Error crashes, and you can fix them by forcing the graphics card to use its reference GPU and Memory clocks. Here is how you can force both NVIDIA and AMD graphics cards to use their reference clocks:
Use the Debug Mode (NVIDIA)
The Debug Mode in the NVIDIA Control Panel forces the graphics card to use its reference clocks, which reduces the GPU load and fixes the Fatal Error crashes. Open the NVIDIA Control Panel, click the “Help” button from the top menu, and select the “Debug Mode” option. You can disable the Debug Mode at any time you want.

Manually Underclock Your Graphics Card (AMD)
AMD Adrenalin Software does not have any settings or options that would force the graphics card to use its stock clocks. This means that you’ll have to manually underclock your AMD graphics card to fix the Fatal Error crashes.
The difference in clock speeds between the reference model and the third-party AIB model is small, somewhere between 50 and 100 MHz. The performance loss will be negligible and the Fatal Error crashes in The Outer Worlds 2 will be fixed.
- Look up the reference GPU clock of your graphics card model online.
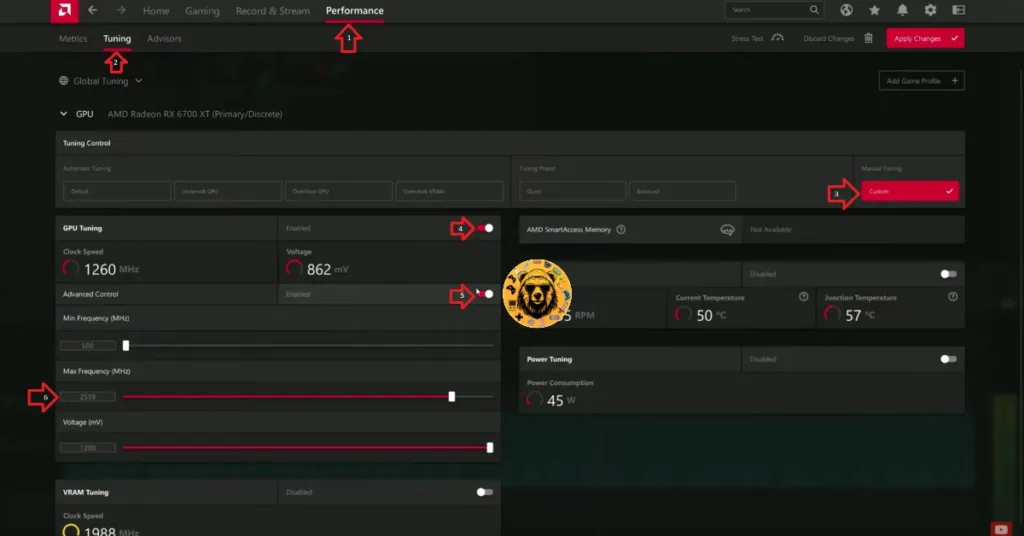
- Open AMD’s Adrenalin Software.
- Go to the “Performance” tab and select the “Tuning” tab.
- Here you will see “Custom” under “Manual Tuning”, click it. Turn on “GPU Tuning” and “Advanced Control”.
- Three sliders: Minimum Frequency, Maximum Frequency, and Voltage will appear on your screen.
- You only have to tweak the Maximum Frequency slider.
- Move the slider slightly to the left to lower and click the “Apply Changes” button. (Use the reference GPU clock that you find online.)
- Continue playing The Outer Worlds 2 and it won’t crash again.
That is all for our The Outer Worlds 2 fixes for the UE Arkansas Fatal Error crashes on your Windows PC. If you are facing errors and issues while playing other games on PC and handhelds, head to our hub of commonly occurring PC errors and their fixes.